Canon BJC-2100 Series User Manual
Browse online or download User Manual for Multifunctionals Canon BJC-2100 Series. Canon BJC-2100 Series User's Manual
- Page / 354
- Table of contents
- TROUBLESHOOTING
- BOOKMARKS
- BJC-2100 1
- Contents 2
- 3Contents 3
- 4Contents 4
- Introduction 5
- Printer Documentation 6
- 7Introduction 7
- How to Use This Manual 8
- 9Introduction 9
- Copyright 10
- Disclaimer 10
- Trademarks 11
- FCC Regulations 12
- Safety Precautions 14
- Printer Location 15
- 16Introduction 16
- Power Supply and Power Cord 17
- 18Introduction 18
- 19Introduction 19
- Working Around the Printer 20
- 21Introduction 21
- Basic Printing Procedures 22
- Examining the Printer 23
- Back View 24
- Inside the Printer 25
- 26Basic Printing Procedures 26
- 27Basic Printing Procedures 27
- Printing Your Document 27
- 28Basic Printing Procedures 28
- 29Basic Printing Procedures 29
- 30Basic Printing Procedures 30
- Loading Plain Paper 33
- 3 Load the stack of paper 34
- Paper Handling 35
- Paper and Other Print Media 36
- 37Paper Handling 37
- 38Paper Handling 38
- 39Paper Handling 39
- Notes on Handling Print Media 40
- ■ Paper Handling Guidelines 41
- 42Paper Handling 42
- ■ Media Sizes 43
- 44Paper Handling 44
- 46Paper Handling 46
- ■ Artist Canvas 47
- ■ Back Print Film 48
- ■ Banner Paper 49
- 50Paper Handling 50
- ■ Glossy Photo Cards 52
- ■ Glossy Photo Paper 53
- ■ Greeting Cards 54
- ■ High Gloss Film 55
- ■ High Resolution Paper 55
- ■ Magnet Sheets 57
- 58Paper Handling 58
- ■ Transparencies 60
- ■ T-Shirt Transfer 62
- ■ Envelopes 63
- ■ Loading Envelopes 64
- Printing Photographs 65
- 4 Start the print job 66
- ■ About Photo Optimizer 67
- Using BJ Cartridges 69
- Types of BJ Cartridges 70
- 71Using BJ Cartridges 71
- BJ Cartridge Guidelines 72
- Replacing Ink Tanks 73
- Replacing the BJ Cartridge 73
- Replacing Ink Tanks 74
- 75Using BJ Cartridges 75
- 76Using BJ Cartridges 76
- 77Using BJ Cartridges 77
- 6 Close the front cover 78
- Replacing the BJ Cartridge 79
- 80Using BJ Cartridges 80
- 81Using BJ Cartridges 81
- 82Using BJ Cartridges 82
- 7 Close the front cover 83
- Selecting the Print Mode 91
- Setting the Page Size 95
- 1 Click the Page Layout tab 96
- Confirming the Paper Feed 99
- Using Online Help 100
- Properties dialog box closes 102
- Defaults button 103
- Printer Driver Basics 105
- Selecting a Printer Driver 106
- 2 Click the BJC-2100 icon 106
- 3 Select Orientation 109
- 4 Click the Apply button 110
- 4 Select the Print Mode icon 114
- Using Balloon Help 119
- Using Background Printing 120
- ■ BJ PrintMonitor Function 122
- Ethernet 124
- Environment 124
- 3 Click the Share button 126
- Setting up client machines 128
- Starting the BJ StatusMonitor 129
- Maintaining the Printer 133
- Cleaning the Printer 134
- 135Maintaining the Printer 135
- 136Maintaining the Printer 136
- For Windows users 137
- 2 Select Test Print 138
- Select Nozzle Check Pattern 139
- Black BJ Cartridge 140
- Cleaning the Print Head 140
- Cleaning the Print Head 141
- For Windows users 142
- 2 Select Print Head Cleaning 143
- 3 Click the OK button 144
- 145Maintaining the Printer 145
- 2 Load the cleaning sheet 146
- 3 Start cleaning 147
- Transporting the Printer 148
- 149Maintaining the Printer 149
- 150Maintaining the Printer 150
- Troubleshooting 151
- Printout Is Unsatisfactory 152
- Macintosh 153
- 154Troubleshooting 154
- ■ Colors Not Clear 155
- 157Troubleshooting 157
- 158Troubleshooting 158
- 160Troubleshooting 160
- 161Troubleshooting 161
- 162Troubleshooting 162
- WindowsWindows 168
- 169Troubleshooting 169
- ■ Straight Lines Are Broken 171
- ■ Printed Pages Curled 172
- 2 Click the Color tab 173
- 174Troubleshooting 174
- ■ Ink Blurred 175
- ■ Printed Surface Scratched 177
- ■ White Streaks Visible 179
- ■ Colors Streaked or Uneven 180
- 183Troubleshooting 183
- or Unnatural 184
- Accurate or 187
- Vivid or Graphic 187
- Spot Color 187
- 189Troubleshooting 189
- 190Troubleshooting 190
- ■ Print Job Does Not Start 191
- 193Troubleshooting 193
- ■ Printing Halts 194
- 195Troubleshooting 195
- 196Troubleshooting 196
- 197Troubleshooting 197
- 198Troubleshooting 198
- Paper Jams or Does Not Feed 200
- 201Troubleshooting 201
- 202Troubleshooting 202
- ■ Envelopes Do Not Feed 203
- 204Troubleshooting 204
- 205Troubleshooting 205
- 206Troubleshooting 206
- ■ Paper Jam 207
- 208Troubleshooting 208
- An Error Message Appears 209
- 210Troubleshooting 210
- 211Troubleshooting 211
- 212Troubleshooting 212
- 213Troubleshooting 213
- 214Troubleshooting 214
- 215Troubleshooting 215
- 216Troubleshooting 216
- ■ Other Error Messages 217
- 218Troubleshooting 218
- Background printing failed 218
- Error number (*202) displayed 219
- Error number (*203) displayed 219
- Other Problems 221
- 222Troubleshooting 222
- 223Troubleshooting 223
- 224Troubleshooting 224
- 225Troubleshooting 225
- 2 Set Backgrounding to On 226
- ■ Ink Runs Out Too Quickly 227
- Before You Call for Help 228
- ■ Narrowing Down the Problem 229
- Getting Help From Canon 232
- Specifications 233
- Printing Specifications 234
- ■ Interface Specifications 235
- ■ General Specifications 236
- ■ Feed Method 237
- ■ Sheet Feeder Capacity 237
- ■ Print Media 238
- ■ Graphic Image Printing 239
- ■ Compatible BJ Cartridges 239
- ■ Hard Disk Space 240
- Printing Area 241
- 247Specifications 247
- × 65.88 in. (Letter) 247
- × 1779.0 mm (A4) 247
- Using the Scanner 249
- Scanner Driver Basics 250
- 252Using the Scanner 252
- ■ White Calibration Sheet 253
- ■ Scanning Holder 253
- Yo u ’ll see this screen: 254
- 255Using the Scanner 255
- 256Using the Scanner 256
- 257Using the Scanner 257
- 3 Remove the BJ cartridge 258
- 259Using the Scanner 259
- Basic Scanning Procedure 260
- 5 Scan the image 261
- 6 Save the scanned image 261
- 263Using the Scanner 263
- Scanning Area Guidelines 265
- Loading an Image 266
- 267Using the Scanner 267
- Scanning an Image 269
- 3 Specify the basic settings 270
- Using IS Scan 271
- Changing the Scanning Mode 274
- Using the Saved Settings 281
- Other IS Scan Features 282
- ■ Using Online Help 283
- Using IS Scan Plus 284
- 3 Select an option: 285
- ■ Closing IS Scan Plus 286
- ■ IS Scan Buttons 287
- Using Copy 288
- Using Capture Image 291
- 5 Click the Prescan button 292
- Using Capture Photo 293
- 2 Specify these settings: 294
- 4 Click the Prescan button 294
- Editing a Scanned Image 295
- Printing a Scanned Image 298
- Saving a Scanned Image 300
- 3 Enter a File name 300
- 5 Click the Save button 301
- Menu button 305
- Scanning Images With IS Scan 311
- 1 Click the Save button 313
- Make the necessary settings 314
- ■ Copying an Image 321
- Adjusting an Image 322
- Modifying An Image 324
- Other IS Scan Functions 328
- 4 Click the OK button 328
- ■ Using the Online Help 329
- Using the Copy Utility 330
- ■ Starting the Copy Utility 331
- Click the Copy Utility icon 332
- ■ Copying the Image 333
- ■ Ending the Copy Utility 334
- Scanner Problems 335
- White Portion Becomes Grayish 336
- 337Scanner Problems 337
- 339Scanner Problems 339
- 341Scanner Problems 341
- Application Program 344
- 346Scanner Problems 346
- Other Scanner Problems 347
- 348Scanner Problems 348
- 349Scanner Problems 349
- 350Scanner Problems 350
- ■ Scanning Too Slow 352
- 3 Click the Graphics button 353
- ■ Error Message Appears 354
Summary of Contents
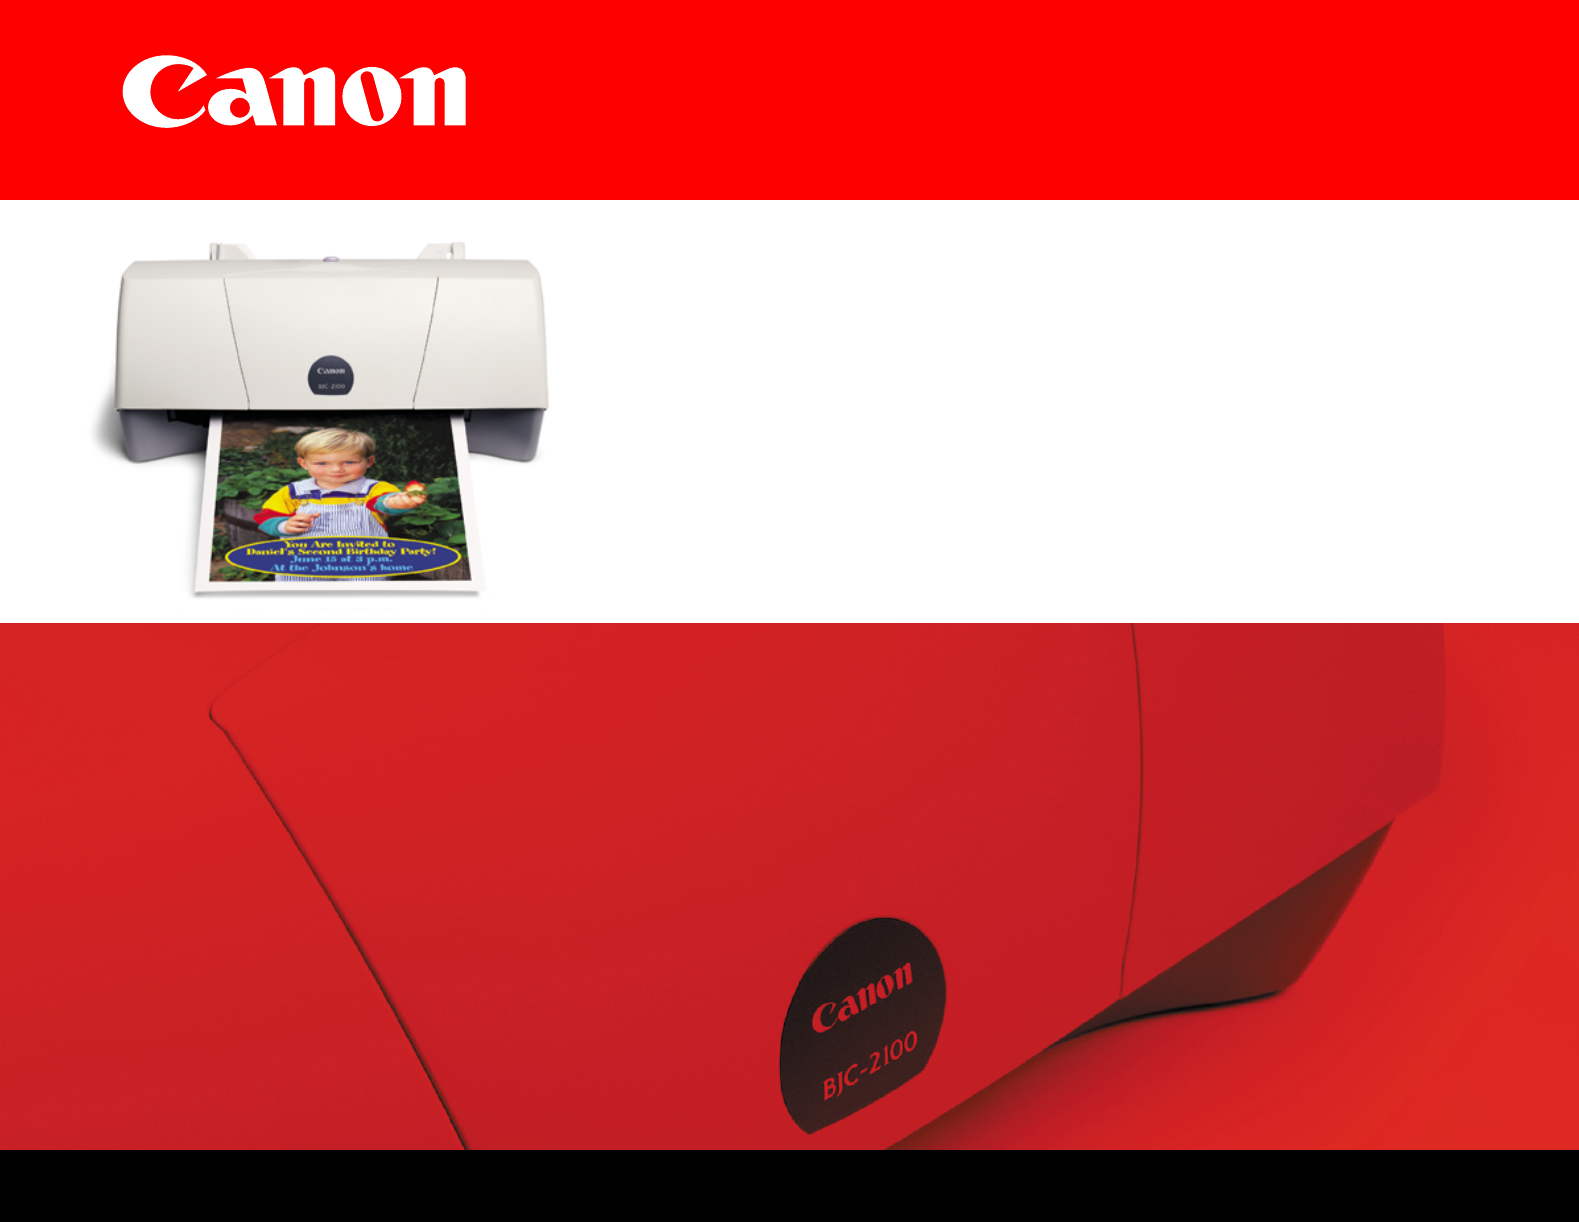
User’s ManualColor Bubble Jet™ PrinterBJC-2100Series
10Introduction Copyright This manual is copyrighted by Canon Computer Systems, Inc. (CCSI) with all rights reserved. Under the copyright laws, this m
100Using the Windows Printer DriverUsing Online HelpWhen you want to learn about a particular topic, the online help function provides the necessary i
101Using the Windows Printer DriverUsing Online Help Finding Information on an Operation Procedure1 Click the Help button on the lower right corner
102Using the Windows Printer DriverClosing the Printer Properties Dialog BoxAfter specifying the necessary print settings, close the Printer Propertie
103Using the Windows Printer DriverClosing the Printer Properties Dialog Box• To set the print settings without closing the Printer Properties dialog
104Using the Macintosh Printer DriverUsing the Macintosh Printer DriverPrinter Driver BasicsSelecting a Printer DriverChanging the Page Setup Dialog B
105Using the Macintosh Printer DriverPrinter Driver BasicsThe printer driver controls communication between the printer and your computer. To use the
106Using the Macintosh Printer DriverSelecting a Printer DriverBefore using the Page Setup dialog box and the Print dialog box, you must first go into
107Using the Macintosh Printer DriverSelecting a Printer Driver3 To perform background printing, set Backgrounding to On.4 Click in the close box to c
108Using the Macintosh Printer DriverChanging the Page Setup Dialog Box SettingsThe size of the paper used for printing is usually set when a document
109Using the Macintosh Printer DriverChanging the Page Setup Dialog Box Settings3 Select Orientation.4 Click the OK button. The Page Setup dialog box
11Introduction Trademarks Canon, BCI, BJ, and Bubble Jet are trademarks, and SelectExchange is a service mark of Canon Inc. Print Planet is a service
110Using the Macintosh Printer DriverChanging the Page Setup Dialog Box Settings2 In Paper Size, select any one of Custom1 to Custom3 and then click t
111Using the Macintosh Printer DriverChanging the Print Dialog Box SettingsBefore you can start printing, you’ll want to make a few basic settings. Se
112Using the Macintosh Printer DriverChanging the Print Dialog Box Settings2 Enter the number of copies to be printed, and then set which pages are to
113Using the Macintosh Printer DriverChanging the Print Dialog Box Settings3 Select BJ Cartridge and Media Type.Click the up- or down-arrow to display
114Using the Macintosh Printer DriverChanging the Print Dialog Box Settings4 Select the Print Mode icon.Select the icon that is closest to your docume
115Using the Macintosh Printer DriverChanging the Print Dialog Box Settings Displaying a Print Preview of the Document To view a preview of the docu
116Using the Macintosh Printer DriverChanging the Print Dialog Box Settings3 Click the Preview button in the Print dialog box.The Preview dialog box i
117Using the Macintosh Printer DriverChanging the Print Dialog Box SettingsWhen the preview screen is displayed as a result of selecting manual for Pr
118Using the Macintosh Printer DriverChanging the Print Dialog Box Settings3 Click the File button in the Print dialog box.4 Type in the name under wh
119Using the Macintosh Printer DriverUsing Balloon HelpTurn on balloon help to display an explanation of each function on the screen. When you positio
12Introduction FCC Regulations Color Bubble Jet Printer, Model BJC-2100This device complies with Part 15 of the FCC Rules. Operation is subject to th
120Using the Macintosh Printer DriverUsing Background PrintingIf background printing is selected with Chooser, you can open the BJ PrintMonitor to con
121Using the Macintosh Printer DriverUsing Background Printing Closing the BJ PrintMonitor WindowWhen you select Close Status Window from the File m
122Using the Macintosh Printer DriverUsing Background Printing BJ PrintMonitor FunctionThe BJ PrintMonitor shows the document currently being printe
123Using the Macintosh Printer DriverUsing Background PrintingThe BJ PrintMonitor makes it possible to perform the following tasks.• You can change th
124Using the Macintosh Printer DriverUsing the Printer With a NetworkThe BJC-2100 Series printer can be connected to a network. To enable use of the p
125Using the Macintosh Printer DriverUsing the Printer With a NetworkPrint serverRefers to the computer to which the printer is directly connected via
126Using the Macintosh Printer DriverUsing the Printer With a Network2 Select the BJC-2100 icon and select the printer name from Connected to:.3 Click
127Using the Macintosh Printer DriverUsing the Printer With a Network4 Confirm that BJC-2100 server is selected for Enter New Print Server Name:, and t
128Using the Macintosh Printer DriverUsing the Printer With a NetworkSetting up client machines1 Select Chooser from the Apple Menu and make AppleTalk
129Using the Macintosh Printer DriverUsing the Printer With a Network Confirming the Status of the Print Server from a Client MachineWhen the progres
13IntroductionFCC Regulations FCC Regulations Use of shielded cable is required to comply with Class B limits in Subpart B of Part 15 of FCC Rules.Do
130Using the Macintosh Printer DriverUsing the Printer With a NetworkSelect a print server on which you can check printing progress.1 Select Print Ser
131Using the Macintosh Printer DriverUsing the Printer With a NetworkFunctions of the BJ StatusMonitorThe progress of print jobs being performed by th
132Using the Macintosh Printer DriverUsing the Printer With a NetworkThe following operations can be performed with the BJ StatusMonitor. Note, howeve
133Maintaining the PrinterMaintaining the PrinterCleaning the PrinterPrinting a Nozzle Check PatternCleaning the Print HeadCleaning the Paper Feed Rol
134Maintaining the PrinterCleaning the PrinterThe inside of the printer may become soiled with ink and paper dust as the printer is used.1 Unplug the
135Maintaining the PrinterCleaning the Printer2 Open the front cover and wipe inside the printer with a clean dry cloth.Look for sprayed ink, paper du
136Maintaining the PrinterPrinting a Nozzle Check PatternThe Nozzle Check Pattern confirms whether the inks are being correctly ejected from the print
137Maintaining the PrinterPrinting a Nozzle Check Pattern For Windows users1 Open the Printer Properties dialog box, then click the Maintenance tab.2
138Maintaining the PrinterPrinting a Nozzle Check Pattern For Macintosh users1 Select Page Setup from the File menu, then click the Utilities button.2
139Maintaining the PrinterPrinting a Nozzle Check Pattern3 Select Nozzle Check Pattern.4 When a confirmation message appears, click the OK button.
14Introduction Safety Precautions Please read the safety warnings provided in this manual to ensure that you use the printer safely. Do not attempt t
140Maintaining the PrinterPrinting a Nozzle Check Pattern Examining a Nozzle Check PatternThe patterns show the status of the BJ cartridge.BC-21e Co
141Maintaining the PrinterCleaning the Print HeadCleaning the print head clears the nozzles. Cleaning the print head consumes ink so clean the print h
142Maintaining the PrinterCleaning the Print HeadFor Windows users1 Open the Printer Properties dialog box, then click the Maintenance tab.2 Select th
143Maintaining the PrinterCleaning the Print HeadFor Macintosh users1 Select Page Setup from the File menu, then click the Utilities button.2 Select P
144Maintaining the PrinterCleaning the Print Head3 Click the OK button.The Cleaning begins. Completion takes approximately 30 seconds.
145Maintaining the PrinterCleaning the Paper Feed RollersIf you frequently print on specially coated paper, like High Resolution Paper, paper dust wil
146Maintaining the PrinterCleaning the Paper Feed Rollers1 Peel the two pieces of tape off the cleaning sheet.2 Load the cleaning sheet• Load the shee
147Maintaining the PrinterCleaning the Paper Feed Rollers3 Start cleaning.Open the Printer Properties dialog box, click the Maintenance tab and then c
148Maintaining the PrinterTransporting the PrinterUse the original box and packing material to repack the printer for shipping or moving to another lo
149Maintaining the PrinterTransporting the Printer4 Disconnect the printer cable from the computer and printer. Also, disconnect the power cord from t
15IntroductionSafety Precautions Printer Location Do not place the printer close to flammable solvents such as alcohol or thinners. If flammable so
150Maintaining the PrinterTransporting the Printer6 Fit the packing material on either end of the printer and pack the printer into the original box.I
151TroubleshootingTroubleshootingPrintout Is UnsatisfactoryPrinter Does Not Start or Stops Mid-jobPaper Jams or Does Not FeedAn Error Message AppearsO
152TroubleshootingPrintout Is UnsatisfactoryColor Document Printed in MonochromeColors Not ClearPrinted and On-screen Colors Do Not MatchPrintout Does
153TroubleshootingPrintout Is Unsatisfactory Color Document Printed in MonochromeA document created in color is printed in monochrome.CHECK 1 BC-20
154TroubleshootingPrintout Is UnsatisfactoryCHECK 4 MONOCHROME PRINTING SELECTED IN APPLICATION PROGRAM?Some application programs have a setting in th
155TroubleshootingPrintout Is Unsatisfactory Colors Not ClearThe colors in printed photographs and illustrations are not as clear as you expected.CH
156TroubleshootingPrintout Is UnsatisfactoryCHECK 2 PRINTER DRIVER SETTINGS CORRECT FOR MEDIA AND PRINT JOB?Open the printer driver dialog box and sel
157TroubleshootingPrintout Is UnsatisfactoryCHECK 3 RE-FILLED INK TANK INSTALLED IN THE BJ CARTRIDGE?You may not be able to achieve satisfactory perfo
158TroubleshootingPrintout Is Unsatisfactory Printed and On-screen Colors Do Not MatchThe colors you see on the screen do not match the colors you s
159TroubleshootingPrintout Is UnsatisfactoryCHECK 2 ARE THE PRINTER DRIVER SETTINGS CORRECT?Open the printer driver dialog box and select the print mo
16IntroductionSafety Precautions Do not place the printer on a thick rug or carpet. Fibers or dust entering the printer could cause a fire.Keep the po
160TroubleshootingPrintout Is Unsatisfactory Printout Does Not Match the Document Displayed on the ScreenThe document is displayed correctly on the
161TroubleshootingPrintout Is UnsatisfactoryCHECK 2 ARE YOU USING THE CORRECT PRINTER DRIVER? Meaningless characters and symbols may print if you have
162TroubleshootingPrintout Is UnsatisfactoryCHECK 4 IS THE PROBLEM IN THE ORIGINAL FILE?If the printout does not match the document displayed on the s
163TroubleshootingPrintout Is Unsatisfactory Printed Text Rotated 90 DegreesThe document text orientation is not correct and it is printed rotated 9
164TroubleshootingPrintout Is Unsatisfactory Printing in Top Left CornerCHECK 1 IS THE PAPER IN THE PRINTER LARGER THAN THE PAGE SIZE SPECIFIED IN T
165TroubleshootingPrintout Is UnsatisfactoryIf you want to use Scaled Printing with reduction, make sure that the correct percentage is set and confirm
166TroubleshootingPrintout Is UnsatisfactoryCHECK 2 IS SCALED PRINTING SET FOR ENLARGEMENT IN THE PRINTER DRIVER?If Scaled Printing is set for enlarge
167TroubleshootingPrintout Is Unsatisfactory Text or Image Reversed (Mirrored)The printed image is printed with left and right sides reversed or “mi
168TroubleshootingPrintout Is Unsatisfactory Enlarged/Reduced Printing Not CorrectA print job set up for Scaled Printing in the printer driver is no
169TroubleshootingPrintout Is Unsatisfactory Single Page Prints Over Two or More PagesCHECK 1 DOES THE PAGE SIZE SETTING IN THE APPLICATION PROGRAM
17IntroductionSafety Precautions Power Supply and Power Cord The socket-outlet shall be installed near the equipment and shall be easily accessib
170TroubleshootingPrintout Is Unsatisfactory Colors Streaked or IncorrectThe text appears scratched, streaked, or the wrong colors are printed.CHECK
171TroubleshootingPrintout Is UnsatisfactoryCHECK 3 DID YOU PRINT ON THE CORRECT PRINT SIDE OF THE MEDIA?The correct print side is different for each
172TroubleshootingPrintout Is Unsatisfactory1 When using Manual for printing, click the Details button in the Print dialog box.2 In the Quality panel,
173TroubleshootingPrintout Is UnsatisfactoryCHECK 2 IS THE PRINTER DRIVER SET FOR HIGH DENSITY PRINTING?Move the Intensity setting (print density) to
174TroubleshootingPrintout Is Unsatisfactory Backs of Pages Stained With InkThe backs of pages are stained after they are printed and ejected from t
175TroubleshootingPrintout Is Unsatisfactory Ink BlurredImages are not sharp or the ink has spread and run together.CHECK 1 ARE YOU PRINTING A PHOTO
176TroubleshootingPrintout Is UnsatisfactoryCHECK 2 ARE YOU USING PLAIN PAPER?If you are using plain paper, use another type of print media. To minimi
177TroubleshootingPrintout Is Unsatisfactory1 When using Manual for printing, click the Details button in the Print dialog box.2 In the Color panel, u
178TroubleshootingPrintout Is UnsatisfactoryCHECK 3 ARE YOU PRINTING ON CURLED PLAIN PAPER?If curled plain paper is loaded with the curl bowing up, th
179TroubleshootingPrintout Is UnsatisfactoryCHECK 5 ARE YOU PRINTING OUTSIDE THE RECOMMENDED PRINTING AREA?If you print outside the recommended printi
18IntroductionSafety Precautions Do not use the printer while the power cord is bundled or knotted. This could cause a fire or electric shock.If you d
180TroubleshootingPrintout Is Unsatisfactory Colors Streaked or UnevenPatterns of uneven or streaked coloring appear on the printout.CHECK 1 IS PRIN
181TroubleshootingPrintout Is UnsatisfactoryCHECK 2 IS HALFTONING SET FOR OPTIMUM PERFORMANCE?Check the Halftoning setting in the Quality tab of the p
182TroubleshootingPrintout Is Unsatisfactory Last Part of Print Job Not PrintingThe last part of each page in the document is not printed.CHECK 1 AR
183TroubleshootingPrintout Is UnsatisfactoryCHECK 3 IS A WPS DRIVER INSTALLED? You may not be able to print correctly with a WPS (Windows Printing Sy
184TroubleshootingPrintout Is Unsatisfactory Characters and Figures Notched / Gradation Streaked or UnnaturalCharacters and figures print with unn
185TroubleshootingPrintout Is Unsatisfactory Color Document Not SatisfactoryCHECK 1 ARE THE COLOR ADJUSTMENT SETTINGS CORRECT?In the printer driver,
186TroubleshootingPrintout Is Unsatisfactory1 When using Manual for Printing, click the Details button.2 Click the Color panel.3 Move the slide bars o
187TroubleshootingPrintout Is Unsatisfactory1 When using Manual for printing, click the Details button.2 Select the Color panel.3 Specify the desired
188TroubleshootingPrintout Is Unsatisfactory1 Open the Printer Properties dialog box, and click the Advanced button in the Main tab.2 Click the Color
189TroubleshootingPrinter Does Not Start or Stops Mid-jobPrinter Does Not Operate After It Is Plugged InPrint Job Does Not StartPrinting HaltsPrinting
19IntroductionSafety Precautions Cleaning and Maintaining the Printer Use a damp cloth to clean the printer. Do not use flammable solvents such as
190TroubleshootingPrinter Does Not Start or Stops Mid-job Printer Does Not Operate After It Is Plugged InThe printer does not operate after its powe
191TroubleshootingPrinter Does Not Start or Stops Mid-job Print Job Does Not StartPrinter does not operate after the print job is executed from the
192TroubleshootingPrinter Does Not Start or Stops Mid-jobCHECK 4 ARE YOU USING THE CORRECT PRINTER DRIVER?A print job may not start if you have select
193TroubleshootingPrinter Does Not Start or Stops Mid-jobCHECK 5 IS THE CORRECT PRINTER PORT SELECTED? If you are using the Parallel interface to con
194TroubleshootingPrinter Does Not Start or Stops Mid-job Printing HaltsThe printer stops printing before the print job is complete.CHECK 1 IS THE P
195TroubleshootingPrinter Does Not Start or Stops Mid-job Printing Starts But Nothing PrintsThe printer operates but nothing is printed on the page.
196TroubleshootingPrinter Does Not Start or Stops Mid-jobCHECK 2 DID YOU REMOVE THE ORANGE PROTECTIVE TAPE FROM THE PRINT HEAD?If the orange protectiv
197TroubleshootingPrinter Does Not Start or Stops Mid-job Cartridge Holder Does Not Return to Home PositionWhen you replace a BJ cartridge or ink ta
198TroubleshootingPrinter Does Not Start or Stops Mid-job Checking the Printer and Computer ConnectionIf you have problems with the printer, the cau
199TroubleshootingPrinter Does Not Start or Stops Mid-job Setting the BJC-2100 as the Default Printer When you are using more than one printer, you
2Contents Contents Introduction WelcomePrinter DocumentationHow to Use This ManualCopyrightDisclaimerTrademarksFCC RegulationsCanadian Radio Interfer
20IntroductionSafety Precautions Working Around the Printer Do not put your hands or fingers in the printer while it is printing. The printer cont
200TroubleshootingPaper Jams or Does Not FeedPaper Does Not Feed From Auto Sheet FeederEnvelopes Do Not FeedPaper Skewing During FeedingMultiple Sheet
201TroubleshootingPaper Jams or Does Not Feed Paper Does Not Feed From Auto Sheet FeederAfter the print job is started, the paper loaded in the auto
202TroubleshootingPaper Jams or Does Not FeedCHECK 4 DID YOU REMOVE THE PAPER REST?Make sure the paper rest is installed on the printer at all times.C
203TroubleshootingPaper Jams or Does Not Feed Envelopes Do Not FeedEnvelopes do not feed or skew during feeding.CHECK 1 ARE THE ENVELOPES CURLED OR
204TroubleshootingPaper Jams or Does Not FeedCHECK 2 ARE TOO MANY ENVELOPES LOADED?You can set up to 5 envelopes in the auto sheet feeder.CHECK 3 IS T
205TroubleshootingPaper Jams or Does Not Feed Paper Skewing During FeedingThe paper or other media does not feed straight into the paper feed slot.C
206TroubleshootingPaper Jams or Does Not Feed Multiple Sheets Feed TogetherWhen you have a stack of paper in the sheet feeder, more than one sheet f
207TroubleshootingPaper Jams or Does Not Feed Paper JamIf paper jams in the printer, remove it.1 Slowly pull the paper out of the printer from the a
208TroubleshootingPaper Jams or Does Not Feed•You can load paper within the range of 17 to 28 lb (64 to 105 g/m2) in the auto sheet feeder. Media Size
209TroubleshootingAn Error Message AppearsError Writing to LPT1 or USBPRNnn Application Error, General Protection Fault Other Error MessagesWindowsWin
21IntroductionSafety Precautions BJ ® Cartridges and Ink Tanks For safety reasons store BJ cartridges and ink tanks out of the reach of small ch
210TroubleshootingAn Error Message Appears Error Writing to LPT1 or USBPRNnn You cannot print when this message appears.CHECK 1 IS THE PRINTER PLUG
211TroubleshootingAn Error Message AppearsCHECK 4 IS THE PRINTER PORT OPERATING CORRECTLY? Check the status of the printer port.When you are using the
212TroubleshootingAn Error Message AppearsWhen you are using the USB interface:1 Right-click the My Computer and then select Properties.2 Double-click
213TroubleshootingAn Error Message AppearsCHECK 6 IS THE PRINTER PORT SETTING IDENTICAL TO THE INTERFACE YOU ARE USING?If the printer port setting is
214TroubleshootingAn Error Message AppearsCHECK 7 IS A WPS DRIVER INSTALLED?You may not be able to print correctly if a WPS (Windows Printing System)
215TroubleshootingAn Error Message Appears Application Error, General Protection Fault CHECK 1 ARE YOU USING A WINDOWS 3.1 APPLICATION PROGRAM?Atte
216TroubleshootingAn Error Message AppearsCHECK 4 IS THERE SUFFICIENT FREE SPACE ON THE HARD DISK?An error may occur if there is not enough free space
217TroubleshootingAn Error Message AppearsCHECK 6 IS THE PRINTER DRIVER INSTALLED CORRECTLY?There may be a problem with the printer driver.Uninstall t
218TroubleshootingAn Error Message AppearsCHECK 2 AN ERROR DISPLAYED IN ANY SCREENS OTHER THAN THE BJ STATUS MONITOR?One of the following messages may
219TroubleshootingAn Error Message AppearsCHECK 3 ANY ERROR NUMBER (XXXX:) DISPLAYED? Error number (*202) displayedSufficient memory not available for
22Basic Printing Procedures Basic Printing Procedures Examining the PrinterPrinting Your DocumentLoading Plain Paper
220TroubleshootingAn Error Message AppearsError number (*300) displayedCheck the following:• Printer is plugged in?• Printer cable is connected secu
221TroubleshootingOther ProblemsCannot Install Printer DriverBJ Status Monitor Does Not Open Cannot Execute Background PrintingInk Runs Out Too Quickl
222TroubleshootingOther Problems Cannot Install Printer DriverCHECK 1 DID YOU FOLLOW THE PRINTER DRIVER INSTALLATION INSTRUCTIONS IN THE QUICK START
223TroubleshootingOther ProblemsCHECK 2 ARE ANY OTHER APPLICATION PROGRAMS RUNNING?The installation program may not execute successfully if it is star
224TroubleshootingOther ProblemsCHECK 4 IS THERE A PROBLEM WITH THE INSTALL ME FIRST CD-ROM?The Install Me First CD-ROM may be damaged. On the Windows
225TroubleshootingOther Problems BJ Status Monitor Does Not Open CHECK 1 DO YOUR COMPUTER AND PRINTER CABLE SUPPORT BI-DIRECTIONAL COMMUNICATION?Ch
226TroubleshootingOther Problems Cannot Execute Background PrintingThe BJ Backgrounder is not displayed during a print job and you cannot use backgr
227TroubleshootingOther Problems Ink Runs Out Too QuicklyCHECK ARE YOU OPENING AND CLOSING THE FRONT COVER?Each time you open the front cover for mo
228TroubleshootingBefore You Call for HelpNarrowing Down the ProblemChecking the Printing Environment
229TroubleshootingBefore You Call for Help Narrowing Down the ProblemIf you are experiencing difficulties, try to narrow the problem down to one of t
23Basic Printing Procedures Examining the Printer This section describes the parts of the printer and how they function. Front ViewPaper RestSupp
230TroubleshootingBefore You Call for Help Checking the Printing EnvironmentCheck the information on the operating environment such as the name and
231TroubleshootingBefore You Call for Help1 On the desktop, click the icon of the hard disk.2 Select Get Info from the File menu.3 Select General Info
232TroubleshootingGetting Help From CanonCanon Computer Systems, Inc. offers a full range of customer technical support* options:• For e-mail technica
233SpecificationsSpecificationsPrinting SpecificationsPrinting Area
234SpecificationsPrinting SpecificationsPrinting methodBubble Jet on-demandPrinting resolution720 (horizontal) × 360 (vertical) dpiPrint speed (printing
235SpecificationsPrinting Specifications Interface SpecificationsInterface (parallel)IEEE 1284-compatibleInterface (USB)USB 1.10-compatible Interface c
236SpecificationsPrinting Specifications General SpecificationsAcoustic noise levelApprox. 45 dB (per ISO 9296)Operating environmentTemperature: 41 to
237SpecificationsPrinting Specifications Feed MethodContinuous feed through auto sheet feeder; single or multiple sheets Sheet Feeder CapacityPlain
238SpecificationsPrinting Specifications Print MediaRegular size Letter, Legal, A4, A5, B5, US Com.#10, European DLCustom size Width: 3.94 to 9.5 in (
239SpecificationsPrinting Specifications Graphic Image PrintingData format Canon extended mode — Raster image formatResolution Canon extended mode — 1
24Basic Printing ProceduresExamining the Printer To ensure optimum performance of the print head, the printer automatically cleans the print head eve
240SpecificationsPrinting Specifications Printer Driver Operating Environment• IBM PC/AT-compatible computer running on Windows 2000, Windows 98, Wind
241SpecificationsPrinting AreaTo ensure the best print quality, the printer allows a margin along each edge of media. Printing area (dark blue): Canon
242SpecificationsPrinting AreaLetter, LegalMedia Type Printable Area (width x height)Letter 8.0 × 10.61 inLegal 8.0 × 13.61 in1.0 in0.93 in0.25 in 0.25
243SpecificationsPrinting AreaA5, B5, A4Media Type Printable Area (width x height)A5 141.2 × 200.0 mmB5 175.2 × 247.0 mmA4 203.2 × 287.0 mm25.4 mm23.5
244SpecificationsPrinting AreaGlossy Photo CardsMedia Type Printable Area (width x height)Glossy Photo Card 4.31 × 6.30 in0.20 in 0.16 in1.02 in1.10 in
245SpecificationsPrinting AreaUS Com. #10 EnvelopeMedia Type Printable Area (width x height) US Com. #10 9.0 × 3.81 in1.0 in0.93 in0.25 in 1.25 in0.28
246SpecificationsPrinting AreaEuropean DL EnvelopeMedia Type Printable Area (width x height)European DL 203.2 × 100.0 mm25.4 mm23.5 mm6.4 mm 10.4 mm7.0
247SpecificationsPrinting AreaBanner PaperMedia Type Printable Area (width x height)Banner Paper 8.24 × 65.88 in. (Letter)203.2 × 1779.0 mm (A4)0.13 in
248Using the Optional IS-22 Color Image Scanner Cartridge Using the Optional IS-22 Color Image Scanner Cartridge Using the ScannerUsing the Scanner W
249Using the ScannerUsing the ScannerScanner Driver BasicsUnpacking the Scanner CartridgeInstalling the IS Scan SoftwareInstalling the Scanner Cartrid
25Basic Printing ProceduresExamining the Printer Inside the PrinterCartridge HolderHolds the BJ cartridge or the optional IS-22 Color Image Scann
250Using the ScannerScanner Driver BasicsInstalling the optional IS-22 Color Image Scanner Cartridge in the printer makes it possible to scan and save
251Using the ScannerScanner Driver BasicsTo use the scanner cartridge, you must install the IS Scan software, which includes the IS Scan scanner drive
252Using the ScannerUnpacking the Scanner CartridgeMake sure you have the following items. IS-22 Color Image Scanner CartridgeThe scanner cartridge
253Using the ScannerUnpacking the Scanner Cartridge White Calibration SheetYou use this sheet to maintain the correct color balance of scanned image
254Using the ScannerInstalling the IS Scan SoftwareBefore installing the IS Scan software, you must install the BJC-2100 Printer Driver.1 Make sure th
255Using the ScannerInstalling the IS Scan Software3 Click the Manuals, Supplies, and Help button. You’ll see this screen:
256Using the ScannerInstalling the IS Scan Software4 Click Canon Accessories and Paper. You’ll see this screen:5 Click the Install IS-22 Driver button
257Using the ScannerInstalling the Scanner Cartridge• The scanner cartridge is composed of precision components. To avoid poor scanning results, do no
258Using the ScannerInstalling the Scanner Cartridge Replacing a BJ Cartridge With the Scanner Cartridge1 Make sure that the printer is plugged in a
259Using the ScannerInstalling the Scanner Cartridge4 Insert the scanner cartridge into the cartridge holder, then lower the cartridge lock lever unti
26Basic Printing Procedures Printing Your Document After you set up the printer, you can start printing. This section describes how to print a docume
260Using the ScannerBasic Scanning ProcedureAfter installing the IS Scan scanner driver, you can use the BJC-2100 printer as a scanner.1 Install the I
261Using the ScannerBasic Scanning Procedure3 The first time you use the scanner, you need to perform the White Level Calibration. Using the White Cali
262Using the ScannerUsing the White Calibration SheetThe white calibration sheet provided with the scanner cartridge is used for maintaining the corre
263Using the ScannerUsing the White Calibration Sheet1 Load the white calibration sheet with the cropped corner at the upper left.2 Follow any instruc
264Using the ScannerUsing the White Calibration Sheet• Do not leave the white calibration sheet in locations that are exposed to direct sunlight or th
265Using the ScannerScanning Area Guidelines • The scanning area varies according to conditions such as the scanning resolution and display resolution
266Using the ScannerLoading an Image1Slide the paper guide to the left edge of the auto sheet feeder.2 Place the image in the scanning holder.• To pre
267Using the ScannerLoading an Image4 Adjust the paper guide to the left edge of the scanning holder.To prevent possible damage to the scanning holder
268Using the Scanner With WindowsUsing the Scanner With WindowsUsing IS ScanChanging the Scanning ModeUsing the Customized Scanning ModeSaving the Set
269Using the Scanner With Windows Using IS Scan This section describes how to scan an image when you start IS Scan from within a TWAIN-compatible app
27Basic Printing ProceduresPrinting Your Document For Windows users 1 Open the Printer Properties dialog box.Select the command used for printing, ma
270Using the Scanner With WindowsUsing IS Scan3 Specify the basic settings.• Click the down-arrow on the right of the Paper Size box and select the mo
271Using the Scanner With WindowsUsing IS Scan• Release the mouse button. The Selection Box appears on the image. • To move the Selection Box, place t
272Using the Scanner With WindowsUsing IS Scan6 Load the image you wish to scan in the auto sheet feeder again.7 Click the Scan button. Remember, if y
273Using the Scanner With WindowsUsing IS Scan• Some TWAIN-compliant graphics application programs do not display the main IS Scan dialog box but inst
274Using the Scanner With WindowsChanging the Scanning ModeYou can select a scanning mode according to your scanning purpose. Optimum settings, such a
275Using the Scanner With WindowsChanging the Scanning ModeWhen you select FAX or OCR, the document is scanned and processed as a grayscale image and
276Using the Scanner With WindowsUsing the Customized Scanning ModeWhen you select Custom in the Scanning Mode box of the main dialog box, the Custom
277Using the Scanner With WindowsUsing the Customized Scanning Mode3 Specify these settings in the Custom dialog box:Standard ValueYou change the stan
278Using the Scanner With WindowsUsing the Customized Scanning ModeCharacter EmphasisDetermines whether or not Image Trust processing is used for scan
279Using the Scanner With WindowsUsing the Customized Scanning Mode4 Click the OK button to return to the main dialog box.5 Make sure that the image y
28Basic Printing ProceduresPrinting Your Document 2 Specify the necessary print settings in the printer driver. Using the Windows Printer Driver 3
280Using the Scanner With WindowsSaving the SettingsYou can save the settings in the main IS Scan dialog box to a file. The next time you scan, you onl
281Using the Scanner With WindowsUsing the Saved SettingsOpen the file in which the desired settings were saved and use those settings for scanning.1 S
282Using the Scanner With WindowsOther IS Scan Features White Level CalibrationUse this feature to maintain the correct color balance of scanned ima
283Using the Scanner With WindowsOther IS Scan Features Enlarging the Scanned Image in the Preview AreaTo enlarge the scanned image in the preview a
284Using the Scanner With WindowsUsing IS Scan PlusIS Scan Plus is a utility program that allows you to edit, enhance, print, and save an image acquir
285Using the Scanner With WindowsUsing IS Scan Plus3 Select an option:CopyScan and immediately print an image without editing. Using CopyCapture Image
286Using the Scanner With WindowsUsing IS Scan Plus Using Online HelpWhen you need detailed instructions, click the Help button in the upper right o
287Using the Scanner With WindowsUsing IS Scan Plus IS Scan ButtonsReturns to the main IS Scan Plus screen.Moves back to the previous screen.Display
288Using the Scanner With WindowsUsing CopyUse the Copy feature when you wish to print an image immediately after scanning. You cannot edit or enhance
289Using the Scanner With WindowsUsing Copy2 Specify any required settings:• Select Color or Monochrome in the Document Type box.• Select Fine or Fast
29Basic Printing ProceduresPrinting Your Document 4 Start printing from the application program.Click the OK button. Printing begins.WindowsClick Her
290Using the Scanner With WindowsUsing Copy4 When you click the Copy button, a message box appears. Click the OK button in the message box to confirm t
291Using the Scanner With WindowsUsing Capture ImageUse the Capture Image feature to scan an image other than a photographic print. You can also edit,
292Using the Scanner With WindowsUsing Capture Image3 Select the paper size in the Paper Size box.4 Insert the image you wish to scan in the scanning
293Using the Scanner With WindowsUsing Capture PhotoUse the Capture Photo feature to scan a photographic print such as a snapshot. You can also edit,
294Using the Scanner With WindowsUsing Capture Photo2 Specify these settings:• Select Color or Black & White in the Photo Type box.• Select Regula
295Using the Scanner With WindowsEditing a Scanned ImageYou can edit or enhance a scanned image acquired using the Capture Image or Capture Photo feat
296Using the Scanner With WindowsEditing a Scanned Image2 You can select these editing options. For details on each feature, use the online Help for I
297Using the Scanner With WindowsEditing a Scanned ImageBackgroundAllows you to add a background to a monochrome image.Crop PhotoCrops a scanned photo
298Using the Scanner With WindowsPrinting a Scanned ImageYou can print a scanned image acquired using the Capture Image or Capture Photo feature. Remo
299Using the Scanner With WindowsPrinting a Scanned ImageIf you are using Capture Photo, the Photo Print Options dialog box appears:Click Print Settin
3Contents Using the Windows Printer Driver Printer Driver BasicsOpening the Printer Properties Dialog BoxSelecting the Print ModeSetting the Page Siz
30Basic Printing ProceduresPrinting Your Document The following screen appears during printing. BJ Backgrounder The BJ Backgrounder is displayed in t
300Using the Scanner With WindowsSaving a Scanned ImageIS Scan Plus allows you to save a scanned image to a file under a new name. You can use the save
301Using the Scanner With WindowsSaving a Scanned Image4 Click the down-arrow for “Save as type” and select a format for the file.You can select one of
302Using the Scanner With MacintoshUsing the Scanner With MacintoshScanning Images With Application SoftwareUsing the Main IS Scan Dialog BoxScanning
303Using the Scanner With MacintoshScanning Images With Application SoftwareThis section explains how to start IS Scan from a TWAIN image editing appl
304Using the Scanner With MacintoshScanning Images With Application Software3 Click the IS Scan BJC-2100 DS icon and then click the OK button.BJC-2100
305Using the Scanner With MacintoshUsing the Main IS Scan Dialog BoxMenu buttonSelects the IS Scan functions. Click this button to change the settings
306Using the Scanner With MacintoshUsing the Main IS Scan Dialog BoxScan, Prescan, or Clear buttonClick this button to start scanning. This button swi
307Using the Scanner With MacintoshScanning an Image1Click the Menu button and then select Settings. The Settings dialog box displays:2 Make the neces
308Using the Scanner With MacintoshScanning an Image• Place a check mark in the Prescan check box. Prescan performs a quick scan so you can check the
309Using the Scanner With MacintoshScanning an Image• To create a Selection Box, position the cursor over one corner of the area to be selected, press
31Basic Printing ProceduresPrinting Your DocumentMacintosh For Macintosh users 1 Select the command used for printing to open the dialog box.Normally
310Using the Scanner With MacintoshScanning an Image7 If the image displayed in the Preview Area is not what you expect, click the Clear button and st
311Using the Scanner With MacintoshScanning Images With IS ScanYou can use IS Scan as a stand-alone program to scan and edit images. Starting IS Sca
312Using the Scanner With MacintoshScanning Images With IS ScanIS Scan starts and the main dialog box displays.The contents of the main dialog box and
313Using the Scanner With MacintoshScanning Images With IS Scan Saving Scanned Images1 Click the Save button.
314Using the Scanner With MacintoshScanning Images With IS Scan2 Make the necessary settings.• Select the location to which you want to save your imag
315Using the Scanner With MacintoshChanging the Scanning ModeYou can select a scanning mode according to your scanning purpose. Optimum settings, such
316Using the Scanner With MacintoshChanging the Scanning ModeText Recommended when scanning a document consisting entirely of text, such as a document
317Using the Scanner With MacintoshChanging the Scanning Mode• The Settings dialog box displays when you select Settings after you click the Menu butt
318Using the Scanner With MacintoshCustomizing the Scanning SettingsWhen you select Custom for Scanning Mode in the Settings dialog box, you can speci
319Using the Scanner With MacintoshCustomizing the Scanning Settings3 Make the appropriate settings for the image to be scanned.Image TypeSelect a mod
32Basic Printing ProceduresPrinting Your Document 3 Start printing from the application program.Click the Print button. Printing begins.The following
320Using the Scanner With MacintoshCustomizing the Scanning SettingsEdge EmphasisThis function is valid only when Image Type is set to Black & Whi
321Using the Scanner With MacintoshCopying a Scanned Image to the ClipboardIf you copy a scanned image to the clipboard, you can use the image easily
322Using the Scanner With MacintoshAdjusting an ImageIf you are not satisfied with a scanned image, you can perform fine adjustment using a range of fun
323Using the Scanner With MacintoshAdjusting an Image2 Move each slide bar to the right or left to adjust the image.BrightnessMoving the Brightness sl
324Using the Scanner With MacintoshModifying An ImageYou can modify a scanned image so that it looks sharper or softer. Also, a Despeckle function all
325Using the Scanner With MacintoshApplying Special Effects to an ImageSpecial effects such as edge emphasis, line emphasis, pixelization, posterizati
326Using the Scanner With MacintoshApplying Special Effects to an Image2 Select a desired function from the list.The following is an example of the sc
327Using the Scanner With MacintoshApplying Special Effects to an Image3 Once you are satisfied with the adjustment, click the OK button.To cancel an a
328Using the Scanner With MacintoshOther IS Scan Functions White Level CalibrationTo achieve the correct color balance for an object to be scanned,
329Using the Scanner With MacintoshOther IS Scan Functions Using the Online HelpClicking the Help button on the main IS Scan dialog box displays hel
33Basic Printing Procedures Loading Plain PaperThis section describes how you load plain paper.1 Lower the paper output tray.The paper output tray ca
330Using the Scanner With MacintoshUsing the Copy UtilityUse this utility to scan an object and then print the result immediately. Although the scanne
331Using the Scanner With MacintoshUsing the Copy Utility3 Drag the Copy Utility for BJC-2100 folder and copy it to any location.Now you can start the
332Using the Scanner With MacintoshUsing the Copy Utility3 Click the Copy Utility icon.The Copy Utility starts and the main dialog box displays:
333Using the Scanner With MacintoshUsing the Copy Utility Copying the Image1 Click the Color or Black & White button according to the image to b
334Using the Scanner With MacintoshUsing the Copy Utility• To print the same image again, click the Reprint button.• To copy another document with the
335Scanner ProblemsScanner ProblemsScanning Result Is UnsatisfactoryScanner Cannot Be Used With a TWAIN-compatible Application ProgramOther Scanner Pr
336Scanner ProblemsScanning Result Is UnsatisfactoryScanned Image Blurred or DistortedQuality of Scanned Image Is UnevenWhite Portion Becomes GrayishP
337Scanner ProblemsScanning Result Is Unsatisfactory Scanned Image Blurred or DistortedCHECK 1 ARE YOU USING A CLEAR IMAGE FOR SCANNING?Blurry image
338Scanner ProblemsScanning Result Is Unsatisfactory Quality of Scanned Image Is UnevenThe scanned image is coarse and/or blurry.CHECK IS THE RESOLU
339Scanner ProblemsScanning Result Is Unsatisfactory White Portion Becomes GrayishCHECK 1 DID YOU PERFORM WHITE LEVEL CALIBRATION?Use White Level Ca
34Basic Printing ProceduresLoading Plain Paper2 To avoid paper jams, fan the stack to remove static cling, then align the edges of the stack by tappin
340Scanner ProblemsScanning Result Is UnsatisfactoryCHECK 3 DID YOU SCAN A MONOCHROME IMAGE USING THE COLOR OR GRAYSCALE SETTING?If the Scanning Mode
341Scanner ProblemsScanning Result Is Unsatisfactory Parts of an Image Missing or Not Aligned ProperlyCHECK 1 DID YOU PLACE AN IMAGE WITHIN THE PROP
342Scanner ProblemsScanning Result Is Unsatisfactory Image Contains Unexpected Colors, or Is Too Light or Too DarkThe appearance of the scanned imag
343Scanner ProblemsScanning Result Is UnsatisfactoryCHECK 2 IS COLOR MATCHING ENABLED?The colors displayed on your display may not match the actual sc
344Scanner ProblemsScanner Cannot Be Used With a TWAIN-compatible Application ProgramCannot Launch IS Scan From Within the TWAIN-compatible Graphics A
345Scanner ProblemsScanner Cannot Be Used With a TWAIN-compatible Application Program Cannot Launch IS Scan From Within the TWAIN-compatible Graphic
346Scanner ProblemsScanner Cannot Be Used With a TWAIN-compatible Application Program Cannot Transfer to TWAIN-compatible Graphics Application Progr
347Scanner ProblemsOther Scanner ProblemsCannot Install Scanner DriverDoes Not Launch With Default Settings Improper Colors Displayed in the Dialog
348Scanner ProblemsOther Scanner Problems Cannot Install Scanner DriverCHECK 1 DID YOU FOLLOW THE SCANNER DRIVER INSTALLATION INSTRUCTIONS? Installi
349Scanner ProblemsOther Scanner Problems• The drive name (E: for example) varies according to how your system is set up.CHECK 4 IS THERE A PROBLEM WI
35Paper HandlingPaper HandlingPaper and Other Print MediaNotes on Handling Print MediaSetting the Paper Thickness LeverPrinting on Special Media Types
350Scanner ProblemsOther Scanner Problems Does Not Launch With Default Settings CHECK DID YOU LAUNCH IS SCAN FROM A TWAIN-COMPATIBLE GRAPHICS APPLI
351Scanner ProblemsOther Scanner Problems Improper Colors Displayed in the Dialog BoxCHECK IS THE NUMBER OF DISPLAY COLORS SET TO HIGH COLOR OR TRUE
352Scanner ProblemsOther Scanner Problems Scanning Too SlowScanning is requiring an unusually long time.CHECK ARE YOU USING A HIGHER RESOLUTION THAN
353Scanner ProblemsOther Scanner Problems Communication Error OccursCHECK 1 DID YOU LAUNCH IS SCAN OR IS SCAN PLUS IMMEDIATELY AFTER IT WAS CLOSED?D
354Scanner ProblemsOther Scanner Problems Error Message AppearsCHECK REFER TO THE ONLINE HELP.From the main IS Scan screen, select Contents from the
36Paper HandlingPaper and Other Print MediaThis section describes the types of print media you can use with the printer. Ordinary Paper• Plain Paper
37Paper HandlingPaper and Other Print Media• Back Print Film This white translucent film is ideal for displays that use backlighting to show a printed
38Paper HandlingPaper and Other Print Media• Glossy Photo CardsA special 4.75 × 8.5 inch sheet made of the same stock as Glossy Photo Paper. You can o
39Paper HandlingPaper and Other Print Media• High Resolution PaperProvides more vivid colors than plain paper. Ideal for printing photographs or busin
4Contents Troubleshooting Printout Is UnsatisfactoryPrinter Does Not Start or Stops Mid-jobPaper Jams or Does Not FeedAn Error Message AppearsOther P
40Paper HandlingNotes on Handling Print Media Media You Can Use With This PrinterBefore you execute a print job, open the printer driver and select
41Paper HandlingNotes on Handling Print Media Paper Handling GuidelinesTo avoid poor print quality and possible damage to the printer, do not use th
42Paper HandlingNotes on Handling Print Media• When storing the print media, put the print media back in its original packaging and avoid locations th
43Paper HandlingNotes on Handling Print Media Media SizesNon-standard sizes must be within the following limits:Minimum: 3.94 × 3.94 in. (100.0 × 1
44Paper HandlingSetting the Paper Thickness LeverSet the paper thickness lever to match the media type.Paper Thickness Lever
45Paper HandlingSetting the Paper Thickness LeverMedia Paper thickness leverPlain paper LeftArtist Canvas RightBack Print Film LeftBanner Paper LeftBr
46Paper HandlingPrinting on Special Media TypesArtist CanvasBack Print FilmBanner PaperGlossy Photo CardsGlossy Photo PaperGreeting CardsHigh Gloss Fi
47Paper HandlingPrinting on Special Media Types Artist Canvas• Load the Artist Canvas with the print side (coated side) up.• Load one sheet at a tim
48Paper HandlingPrinting on Special Media Types Back Print FilmThis is semi-transparent film used for backlit display. Printed images are reversed (m
49Paper HandlingPrinting on Special Media Types Banner PaperBanner Paper consists of letter-size sheets that are joined together to make one long st
5Introduction Introduction WelcomePrinter DocumentationHow to Use This ManualCopyrightDisclaimerTrademarksFCC RegulationsCanadian Radio Interference
50Paper HandlingPrinting on Special Media Types• Tear off the number of sheets you want to print, plus one extra. A maximum of six sheets can be prin
51Paper HandlingPrinting on Special Media TypesLoad the banner paper so that the trailing edge is folded up and not hanging down.• Fold the joint betw
52Paper HandlingPrinting on Special Media Types Glossy Photo CardsThis specialized paper has the same qualities as Glossy Photo Paper. By setting th
53Paper HandlingPrinting on Special Media Types Glossy Photo PaperGlossy Photo Paper is thicker than High Resolution Paper and has a glossy surface
54Paper HandlingPrinting on Special Media Types• Set the Media Type setting in the printer driver to Glossy Photo Paper. Selecting the BJ Cartridge an
55Paper HandlingPrinting on Special Media Types High Gloss FilmYou can print high quality photographs using this media type with a BC-21e Color BJ C
56Paper HandlingPrinting on Special Media Types Selecting the BJ Cartridge and Media Type Changing the Print Dialog Box Settings• You can allow up to
57Paper HandlingPrinting on Special Media Types Magnet SheetsPrepare the Magnet Sheet as follows:• Place one sheet of plain paper behind one Magnet
58Paper HandlingPrinting on Special Media Types• From the bottom edge, roll the two sheets together with the plain paper facing out and glossy side of
59Paper HandlingPrinting on Special Media Types• Set the Media Type setting in the printer driver to Glossy Photo Paper. Selecting the BJ Cartridge an
6Introduction Welcome Thank you for purchasing the BJC-2100 Series Color Bubble Jet Printer. Printer Documentation The documentation for your printer
60Paper HandlingPrinting on Special Media Types TransparenciesThis is special film for use in overhead projectors. Do not use transparencies for othe
61Paper HandlingPrinting on Special Media Types• Load transparencies with the printing side facing up.• You can load up to 20 sheets at one time in th
62Paper HandlingPrinting on Special Media Types T-Shirt TransferYou use T-Shirt Transfers for making iron-on appliques for T-shirts. Original T-shir
63Paper HandlingPrinting on Special Media Types Envelopes• To assure crisp, clear printing, do not use envelopes with textured or coated surfaces. T
64Paper HandlingPrinting on Special Media Types3 For more reliable feed, make sure the flaps lie flat by rubbing with the tip of a pen. Loading Envelo
65Paper HandlingPrinting Photographs Tips for Printing Photographic ImagesTo produce the best possible print quality for printing photographic image
66Paper HandlingPrinting Photographs3 Adjust the printer driver settings. For Windows users For Macintosh usersFor optimum reproduction of all the co
67Paper HandlingPrinting PhotographsFor Macintosh users1 Select the command used for printing (for example, Print from the File menu) to open the Prin
68Paper HandlingPrinting Photographs4 Check the Whole Page checkbox, if necessary.Enabled: When the Whole Page setting is enabled, the Photo Optimizer
69Using BJ CartridgesUsing BJ CartridgesTypes of BJ CartridgesBJ Cartridge GuidelinesReplacing Ink TanksReplacing the BJ Cartridge
7IntroductionPrinter Documentation Conventions This User’s Manual uses the following symbols to indicate important information. Always observe t
70Using BJ CartridgesTypes of BJ CartridgesThis section describes the BJ cartridges that you can use with the printer. Select the BJ cartridge that be
71Using BJ CartridgesTypes of BJ CartridgesThe BC-21e Color BJ Cartridge contains two replaceable ink tanks:• BCI-21 Color Ink TankContains Cyan, Mage
72Using BJ CartridgesBJ Cartridge Guidelines• Always store BJ Cartridges and ink tanks safely out of the reach of small children. If a child inadverte
73Using BJ CartridgesBJ Cartridge Guidelines Printing a Nozzle Check Pattern Cleaning the Print Head Replacing Ink Tanks Replacing the BJ Cartridge• P
74Using BJ CartridgesReplacing Ink TanksWhen using the BC-21e Color BJ Cartridge, you can replace the ink tanks when they run out of ink.When you purc
75Using BJ CartridgesReplacing Ink Tanks2 Pull the tab on the ink tank toward you to release it. Then pull it out of the slot.• To avoid staining your
76Using BJ CartridgesReplacing Ink Tanks3 Remove a new ink tank from its package and remove the protective orange cap.• To avoid staining your hands,
77Using BJ CartridgesReplacing Ink Tanks4 Slide the new ink tank into the slot.5 Firmly push the ink tank tab down and back into an upright position u
78Using BJ CartridgesReplacing Ink Tanks6 Close the front cover.• The cartridge holder moves to the home position on the right side of the printer.• T
79Using BJ CartridgesReplacing the BJ CartridgeWhen a BC-20 Black BJ Cartridge or BC-22e Photo BJ Cartridge runs out of ink, or when you want to switc
8Introduction How to Use This Manual To view this User’s Manual , please use Acrobat Reader 4.0, which is included on your CD-ROM, or a later versio
80Using BJ CartridgesReplacing the BJ Cartridge2 Raise the blue cartridge lock lever on the right side of the cartridge holder to unlock the cartridge
81Using BJ CartridgesReplacing the BJ CartridgeIf you are replacing a depleted BJ cartridge, dispose of it immediately. If you are exchanging BJ cartr
82Using BJ CartridgesReplacing the BJ Cartridge4 Take the new BJ cartridge out of its package.Remove the orange protective cap and tape.5 Set the BJ c
83Using BJ CartridgesReplacing the BJ Cartridge6 Set the paper thickness lever for the type of media that you are going to load. Setting the Paper Thi
84Using the Windows Printer DriverUsing the Windows Printer DriverPrinter Driver BasicsOpening the Printer Properties Dialog BoxSelecting the Print Mo
85Using the Windows Printer DriverPrinter Driver BasicsThe printer driver controls communication between the printer and your computer. To use the pri
86Using the Windows Printer DriverOpening the Printer Properties Dialog BoxWhen you specify the print settings or use maintenance functions such as pr
87Using the Windows Printer DriverOpening the Printer Properties Dialog Box2 Make sure that Canon BJC-2100 is selected in the Printer box.If another p
88Using the Windows Printer DriverOpening the Printer Properties Dialog Box3 Click the Properties button. The Printer Properties dialog box opens. Mak
89Using the Windows Printer DriverOpening the Printer Properties Dialog Box Directly From the Start MenuWhen you wish to specify print settings that
9IntroductionHow to Use This Manual This column displays a table of contents for the User’s Manual . Click the desired item to jump to the topic.Cli
90Using the Windows Printer DriverOpening the Printer Properties Dialog Box3 Select Properties from the File menu. The Printer Properties dialog box o
91Using the Windows Printer DriverSelecting the Print ModeBefore you start a print job, open the Printer Properties dialog box and specify the print m
92Using the Windows Printer DriverSelecting the Print Mode• In addition to the BJ Cartridge and Media Type settings, other print settings are also pre
93Using the Windows Printer DriverSelecting the Print Mode Selecting the BJ Cartridge and Media TypeAfter you select the icon, match the BJ Cartridg
94Using the Windows Printer DriverSelecting the Print ModeWhen you change a default setting in the BJ Cartridge or Media Type box, the icon that indic
95Using the Windows Printer DriverSetting the Page SizeSet the page size you use from within the application program before printing. Also make sure t
96Using the Windows Printer DriverSetting the Page Size Changing the Page Size (for standard paper sizes)1 Click the Page Layout tab.2 Click the dow
97Using the Windows Printer DriverSetting the Page Size Changing the Paper Size (for custom paper sizes)1 Click the Page Layout tab.2 Click the down
98Using the Windows Printer DriverSetting the Page Size3 Select inches or millimeters for the unit of measurement in the Unit box, and enter the desir
99Using the Windows Printer DriverConfirming the Paper FeedYou can view the paper feed method in the illustrated guideline in the Main tab.If this info
Related products and manuals for Multifunctionals Canon BJC-2100 Series
 (119 pages)
 (98 pages)
 (2 pages)
(20 pages)
(20 pages)
(16 pages)
(16 pages)
(2 pages)
(20 pages)
(20 pages)
(16 pages)
(16 pages)
© 2020, manymanuals.com. All rights reserved. | 1.633 s |
 Manymanuals.com
 Manymanuals.de
 Manymanuals.fr
 Manymanuals.it
 Manymanuals.pl
 Manymanuals.cz
 Manymanuals.es
 Manymanuals-pt.com
Comments to this Manuals