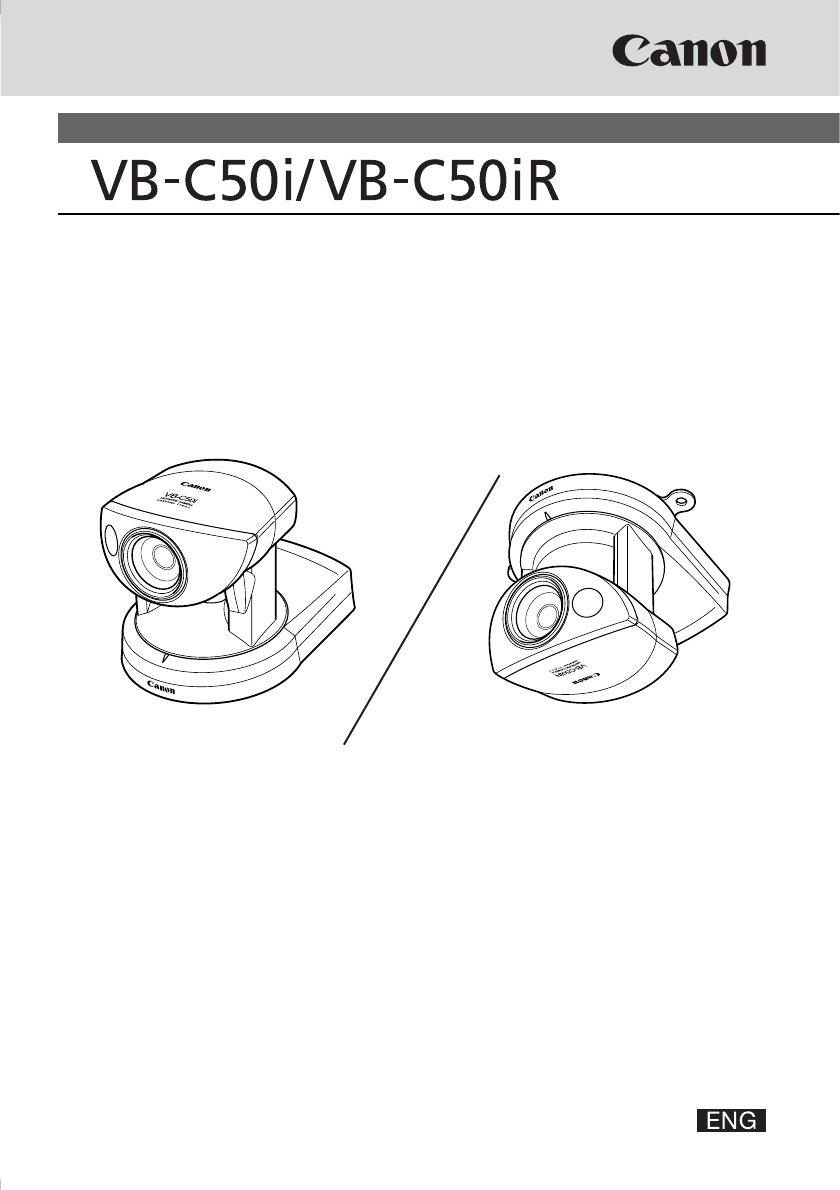
Canon VB-C50i/VB-C50iR User Manual
Browse online or download User Manual for Security cameras Canon VB-C50i/VB-C50iR. Canon VB-C50i/VB-C50iR Projector Line Up
- Page / 244
- Table of contents
- TROUBLESHOOTING
- BOOKMARKS
- User’s Manual 1
- Introduction 2
- Usage Notice of Audio 3
- Package Contents 4
- Contents 5
- Chapter 7 Appendix 8
- How to Read This Manual 9
- For Users in the UK (PA-V16) 10
- FCC NOTICE 11
- FDA regulation 11
- Safe Use of Equipment 12
- For CA, USA only 14
- Maintenance 15
- Before Using the 17
- VB-C50i/VB-C50iR 17
- Viewer for Java Ver. 3.6 20
- Viewer for PC Ver. 3.6 20
- Example of Use 28
- Setting Up 29
- Setup Workflow 30
- Install the software5 31
- 1. Set Up the Camera 32
- Turning the Power ON and OFF 34
- Supplied CD-ROM 35
- Installation Example 35
- Click to select 36
- 5. Install the Software 39
- Viewer Software Overview 40
- Basic Settings 41
- Settings Title Page 44
- Root Account 45
- Connection Keeping 46
- Video Capture 47
- Camera Control 48
- Camera Names 52
- Presetting Best Shot (Preset) 53
- Preset 1-20 55
- Common Settings 56
- HTTP Server 57
- Camera Server 58
- Audio Transmission 59
- Audio Reception 60
- Authorized User Account 61
- Current Camera Time 64
- New Camera Time 65
- Time Zone 65
- External Device Names 68
- Miscellaneous 70
- Log Viewer (→ P.4-62) 74
- Admin Viewer (→ P.4-65) 74
- Panorama Creation Tool 77
- Capturing Panorama Pictures 79
- Reconnecting 81
- View Restriction Tool 82
- Setting View Restrictions 85
- Changing Settings 86
- Preset Setting Tool 88
- Setting Presets 91
- Preset Tour 94
- Setting Preset Tour 96
- Normal Schedule 99
- Setting Up a Normal Schedule 100
- VB Administration Tools 101
- Schedule Setting Tool 102
- Special Schedule 103
- Setting Up a Special Schedule 104
- Resetting Schedule Settings 107
- Setting Up Service 108
- Timer Setting Tool 109
- Setting Up Audio Playback 111
- Setting Up Picture Recording 111
- Motion Detection Setting Tool 112
- Setting Up Motion Detection 114
- Night Mode Setting Tool 122
- Setting Up Night Mode 123
- Device Input Setting screen 126
- Device Output Setting screen 128
- Log Viewer 132
- Viewing the Log 133
- Admin Viewer 135
- Starting Up Admin Viewer 136
- Operating a Camera 138
- Camera-Specific Functions 140
- Sending and Receiving* Audio 141
- Shade Correction 143
- Auto Reconnection Function 143
- Creating Web Pages for 145
- Video Distribution 145
- Internet 146
- Creating Web Pages 147
- Viewer Overview 148
- Viewer for PC 149
- Viewing Sample Pages 150
- Saving Web Page Data 152
- 1 sample.htm 154
- 2 header.htm 154
- 3 lvappl.htm 154
- 1 glimps.htm 156
- 2 popup.htm 156
- Certain Images Specified 158
- Viewer for Java Parameters 161
- Description 162
- Omissible 162
- Parameter Name 162
- Setting Up the Web Server 165
- Creating wvh Files 166
- (→ P.3-6) 168
- Overwriting Sample Pages 172
- Using the Picture 175
- Recording Function 175
- Ethernet 180
- VB-C50iR 180
- Warning device 182
- Using VBCollector 185
- Installing VBCollector 186
- Starting Up VBCollector 187
- Registering a Server 187
- Editing Server Information 189
- Registering Tasks 190
- Executing and Canceling Tasks 192
- Check Task Status 193
- Starting/Stopping the Service 194
- Using the Display Modes 199
- ● Zoom in/out 201
- ● Animation 201
- Finding Data 202
- ● Filtered searches 203
- ● Deleting search results 203
- Extracting Files 204
- Managing Extracted Files 204
- Deleting Data 205
- Viewing Logs 206
- Search Logs 208
- Selecting Log Files 209
- Appendix 213
- Troubleshooting 214
- Log Messages 216
- ■ System-related Log Messages 223
- The VBCollector Log Messages 224
- Specifications 228
- External Device I/O Terminals 229
- System Configuration 230
- Sample Network Configurations 231
- 00008501F162 234
- During initializing 236
- Factory Default Settings 237
- Amount of Memory 239
- Frame Sizes 239
- Amount of Audio Data* 240
Summary of Contents
CANON INC. 30-2, Shimomaruko 3-chome, Ohta-ku, Tokyo 146-8501, JapanU.S.A. CANON U.S.A.,INC. NEW JERSEY OFFICE100 Jamesburg Road, Jamesburg, NJ 08831
xa Safe Use of EquipmentaAn exclamation point, within a triangle, is intended to alert the user to the presence ofimportant operating and maintenance
4-30Setting Up a Normal ScheduleTo Make Settings...1. With the Normal Schedule displayed, selectan optional schedule number.The schedule track for the
4-31VB Administration ToolsContinued on the following page. aSchedule Setting ToolTip● On Weekly setting, if you specify the same time and the same da
4-32Tip● You can register different settings for each setting number. The number of settingnumbers that can be registered differs depending upon the s
4-33VB Administration ToolsSpecial ScheduleWith Special Schedule, you can set up a schedule on one specific day of the week. For example,on a public h
4-34Tip● You can only set one type of Special Day per day.● You can set one Special Day a maximum of 32 times.● You can also set up a Schedule by righ
4-35VB Administration Tools3. Double-click the sub-schedule track.The Special Schedule Settings dialog box appears.Enter settings for the schedule.4.
4-36Tip● An icon for the service you have set up appears in the schedule track in the calendar.However, where the schedule track is short, it may be t
4-37VB Administration ToolsTip●If you have set up a Normal Schedule (→ P.4-29) and a Special Schedule with the samestart and end time, the Special Sch
4-38Setting Up ServiceSet up the services to be performed in the schedules.To open the settings screen for each service, in the“Service” tab in the Sc
4-39VB Administration ToolsTimer Setting ToolThe section below describes the “Picture Recording” function that takes still images and recordsaudio* at
xia Safe Use of EquipmentFCC NOTICENetwork Camera, Model Name: PT-50iNv, PT-50iP, PT-50iNRv, PT-50iPRThis device complies with Part 15 of the FCC Rule
4-40Schedule Setting Tooli Repetition IntervalSets the interval between repeated image recording. Repetition Interval can be set to a maximumof 23 hou
4-41VB Administration ToolsSchedule Setting ToolTip● Sample sound files are contained on the CD-ROM.● For registering and deleting audio files, see “A
4-42q “Load Settings” buttonLoads the motion detection settings currently set in the VB-C50i/VB-C50iR.w “Save Settings” buttonSaves the current motion
4-43VB Administration ToolsFlow of Motion Detection SettingsA summary of the procedures for motion detection is given below. Please refer to each refe
4-44Setting Up Motion DetectionTo Make Settings...1. Open the Motion Detection Setting Tool with the Schedule Setting Tool.In the Service tab in a Nor
4-45VB Administration Toolsq Used AreaCheck the number of the motion detection area to be usedand the detection area frame is displayed in the Viewer.
4-46Tip● If Sensitivity is set at a low level, the device does not recognize the motion evenduring great variations in the image inside the motion det
4-47VB Administration Tools5. Enter picture recording settings when thedevice detects motion (Recording tab).Enter the settings for picture recording
4-486. Enter the settings for output to an externaldevice when the device detects motion(Output tab).* The settings in this step are optional.Set outp
4-49VB Administration ToolsNote● Because the video distribution frame rate may be lowered when the data is sentvia a proxy server, connection without
xiia IMPORTANT SAFETY INSTRUCTIONSIn these safety instructions, the word“equipment” refers to the Canon NetworkCamera VB-C50i/VB-C50iR and all itsacce
4-50TipMotion detection status and screen displayThe area in which the VB-C50i/VB-C50iR isperforming motion detection appears in a blueframe in the Vi
4-51VB Administration ToolsqwTipSetting the motion detection level while checking recordedimagesTo set the level of motion detection at motion detecti
4-52q w ertyuNight Mode Setting ToolBelow is a description of the Night Mode function with which you can take pictures in dark conditions.Night Mode S
4-53VB Administration ToolsSetting Up Night ModeTo Make Settings...1. With the Schedule Setting Tool, open the Night Mode Setting Tool.In the Service
4-54q w ertyui!2o!0!3External Device Input Setting ToolBelow is a description of the External Device Input function which performs video recording whe
4-55VB Administration Toolso Pre-event Recording Time (sec.) and IntervalEnter the required number of seconds, within a range of 0-10 seconds for pict
4-56Schedule Setting Tool3. Specify the Audio Playback operation settings.Check “Playback at ON event” or “Playback at OFF event” and select the playb
4-57VB Administration ToolsExternal Device Output Setting ToolThe section below describes the output settings to an external device connected to the M
4-58Setting Up External Device OutputTo Make Settings...1. With the Schedule Setting Tool, open the External Device Output Setting Tool.In the Service
4-59VB Administration ToolsTipRelationship between ON and OFF events and picture/audiorecording** Only available with two particular models (→ P.iii)O
xiiifig-1EXAMPLE OF ANTENNA GROUNDING AS PER NATIONAL ELECTRICAL CODEANTENNA LEAD IN WIREANTENNA DISCHARGE UNIT (NEC SECTION 810-20)GROUNDING CONDUCTO
4-60TipE-mail Notification Settings dialog boxWhen pictures have been recorded, you can send the recorded picture and data inan e-mail. Settings for s
4-61VB Administration ToolsTipAudio Playback Settings dialog boxTo play back audio, you have to register the audio file you want to play back. Setting
4-62The Log Viewer is a tool for downloading log files, and viewing and managing the operating statusof the device. The Log Viewer provides monitoring
4-63VB Administration ToolsLog ViewerViewing the LogThe following content is displayed in the log.● CodeThe log displays error codes. For error codes,
4-64Using Selection Criteria to Display LogsLogs can be filtered according to error type, code, or date and time so that only the requiredinformation
4-65VB Administration ToolsAdmin ViewerAdmin Viewer is a viewer which has functions for managing the VB-C50i/VB-C50iR. It has specialprivilege functio
4-66Starting Up Admin ViewerTo Start Up...1. Click the “Admin Viewer” on the VBAdmin Startup Panel or double-click the“Admin Viewer” icon on the deskt
4-67VB Administration ToolsNoteDepending on the settings content, some operations are not available from Admin Viewer.Displaying and Saving the Extern
4-68Enabling/Disabling View RestrictionsView restrictions can be enabled or disabled when controlling the camera.To Make Settings...1. Choose either “
4-69VB Administration ToolsClicking the Screen to Control the CameraYou can control the pan, tilt and zoom operations by clicking and holding the mous
xiv - Locations exposed to direct sunlight - Locations exposed to salt spray - Close to flammable solvents (alcohol,thinners, etc.)22. When any of the
4-70Camera-Specific FunctionsYou can set up camera-specific features such as settings for exposure, digital zoom and night mode.How to Operate and Set
4-71VB Administration ToolsSending and Receiving* AudioYou can send and receive* audio with the VB-C50i/VB-C50iR through the speakers andmicrophone* i
4-72Tip● The “Microphone setting” button will not appear in the following cases.• If Audio Reception has not been set to “Used” in the Audio Server se
4-73VB Administration ToolsShade CorrectionIf the background of an image is bright, making the subject difficult to see, you can adjust thecontrast of
4-74Admin ViewerRestoring the Default Exposure and Focus Settings When Closing the Admin ViewerWhen you use manual exposure in the camera-specific fun
Creating Web Pages forVideo DistributionThis chapter describes how to use the VB-C50i/VB-C50iR towebcast information.Picture data can be distributed i
5-2HTTP (WWW) serverDedicatedWeb serverViewer PC1 Access to Web pages3 Request for video4 Video distribution2 IP address information notificationInter
Creating Web Pages5-3Web Pages for Video DistributionTipYou can use the Language setting function for the Browser to create a multi-lingualWeb site. F
5-4There are 2 types of viewers: the Viewer for Java and the Viewer for PC.For a detailed explanation of the Viewers, please refer to “Viewer Software
Creating Web Pages5-5Viewer OverviewNote● Viewer Software User’s Manual is provided on the CD-ROM supplied with theVB-C50i/VB-C50iR (Viewer-E.pdf).● U
xvMaintenanceCleaning the Equipment1. Unplug the AC adapter from the wall outlet.2. Carefully wipe the equipment with a soft cloth that hasbeen moiste
5-6This is a LiveApplet sample page which distributeslive videos and allows users to control the camera.This is a sample page which combinesLiveApplet
Creating Web Pages5-7This section describes how to use the Viewers for Java to provide videos. Application examplesare also given.Using the Viewer for
5-8Using the Viewer for Java to Distribute VideosSaving Web Page DataThe VB-C50i/VB-C50iR is equipped with a Flash memory where Web page data can be s
Creating Web Pages5-9Using the Viewer for Java to Distribute VideosExample of Using the Viewer for Java to Create a Web PageThis section describes an
5-101 sample.htm<html><head><title>SampleSite LiveApplet</title></head><frameset rows="70,*"><frame s
Creating Web Pages5-11Click the button todisplay the page inwhich LiveApplet isembedded.Using Glimpse and LiveApplet TogetherThis section describes ho
5-121 glimps.htm<html><head><script language="JavaScript"><!--function clicked(btn) {url = btn.namewindow.open(url,&quo
Creating Web Pages5-13Providing “LiveApplet” with Camera Control Restricted to PresetsThis section describes how to create a Web page that only displa
5-14Certain Images SpecifiedStartup screen Disconnection screenIf no particular image is specified, the “connecting to hostname” (when the hostname pa
Creating Web Pages5-15Displaying the Host Name, Frame Count and Other Information on the Video Screen<param name=show_fps value="on">
xvi 000-VBC50i-E-US 06.7.6, 11:30 AM16
5-16Displaying Bitmap Images on the Video Screen<param name=superimpose value="/local/logos/newlogo.gif,0,0">* The underlined portion
Creating Web Pages5-17Viewer for Java ParametersYou can specify applet parameters to provide an applet tailored to modify the behavior orappearance of
5-18Using the Viewer for Java to Distribute VideosWhen a startup screen is specified in the “open_image” parameter, this parameter specifies the displ
Creating Web Pages5-19Using the Viewer for Java to Distribute VideosSpecifies whether or not connection to the camera server should be established sim
5-20Using the Viewer for Java to Distribute VideosTipWhen specifying an address included in the codebase attribute of the applet tag anda URL paramete
Creating Web Pages5-21This section describes how to use the Viewer for PC to provide videos. Application examples arealso given.If a client is using t
5-22TipInstead of an IP address, you can also type in <_I_P_A_D_D_R_> (→ P.5-9).Example: <_I_P_A_D_D_R_> 65310<_I_P_A_D_D_R_> 65311w
Creating Web Pages5-23Using the Viewer for PC to Distribute VideosInclude the tags that link to the wvh file in the text or images in the Web page.1 &
5-24Distributing Videos Using a Browser OnlyYou can also use the WebView-HTTP protocol to provide videos from the VB-C50i/VB-C50iR directlyto a Web br
Creating Web Pages5-25GetStillImage ParametersParameter Descriptionp or panSpecifies the camera pan angle. “p” is a 1° unit, and “pan” is a 0.01° unit
Before Using theVB-C50i/VB-C50iRThis chapter describes the features of the VB-C50i/VB-C50iR, the hardware and software requirements, and thename and f
5-26NoteContact respective manufacturers for details on setting the router.One fixed global address is required if the VB-C50i/VB-C50iR is being used
Creating Web Pages5-27You can view still images and control the camera using the Web service of a mobile phone. Youcan easily create still image distr
5-28Example of Creating a Screen for Distribution of a Still Image to a Mobile PhoneCamera Control by Position SpecificationIf you use the sample page
Creating Web Pages5-29Example of Creating a Screen for Distribution of a Still Image to a Mobile Phonestill.jpg parametersCommand Descriptioncamera_id
5-30 005-VBC50i-E-US 06.7.6, 11:36 AM30
Using the PictureRecording FunctionThis chapter describes a couple of specific examples of thePicture Recording function using the VB-C50i/VB-C50iR. S
6-2Using the Still Picture Recording Function Linked to an External DeviceBy combining various sensors and switches to operate according to External D
6-3Using the Picture Recording FunctionUsing the Still Picture Recording Function Linked to an External DeviceSample Still Picture Recording SettingsS
6-4Using the Audio Playback/Recording* Function Linked to an External Device* The Audio Recording function is available with two particular models (→
6-5Using the Picture Recording FunctionUsing the Audio Playback/Recording Function Linked to an External DeviceSample SettingsSettings specified on th
1-2The VB-C50i/VB-C50iR is a system that distributes live videos via the Internet or an intranet. Itcan be used in a wide range of applications, such
6-6Using the Still Picture Recording Function with a Predetermined ScheduleBy using the “Schedule” setting, you can construct a monitoring system that
6-7Using the Picture Recording FunctionUsing the Still Picture Recording Function with a Predetermined ScheduleSample Still Picture Recording Settings
6-8Using the Motion Detection Function with a Predetermined ScheduleBy running the motion detection function according to a schedule, you can construc
6-9Using the Picture Recording FunctionSample Still Picture Recording SettingsSettings specified on the “Camera and Video” page (→ P.3-7)Specify the a
6-10● Next, set the sensitivity, area ratio and duration.To ensure that the event is not triggered by unrelatedlighting changes or small movements, se
6-11Using the Picture Recording FunctionUsing VBCollectorDownloaded data displaysPictures and audiorecorded with theVB-C50i/ VB-C50iR’srecording funct
6-12Using VBCollectorInstalling VBCollectorAs described in “Install the Software” in Chapter 2 “Setting up” (→ P.2-11), select Custom Installationto
6-13Using the Picture Recording FunctionUsing VBCollectorStarting Up VBCollectorVBCollector is started up by choosing it from Start menu.To Start Up V
6-14Using VBCollectorNote● Operate VBCollector with an authority greater than PowerUsers.● NTFS is recommended for such file systems containing the in
6-15Using the Picture Recording FunctionNoteDownloaded data is not deleted when a server is deleted. To delete downloadeddata, first use the “Deleting
1-3Before Using the VB-C50i/VB-C50iRFeatures of the VB-C50i/VB-C50iRcontrast of the darker areas to make it easier to see. Unlike backlight compensati
6-162. Enter each item in the various items and clickthe “OK” button.q Task NameAssign a name to the task.“Enable this setting”Select “Enable this set
6-17Using the Picture Recording FunctionNote● Up to 16 tasks can be executed by VBCollector simultaneously. Please be surenot to load a schedule with
6-18Editing TasksThe details of a registered task can be edited.To Edit a Task...1. In the Task View, select the task to be editedby clicking on its n
6-19Using the Picture Recording Function2. Check the download status and click the“Close” button to close the dialog box.If you want to cancel downloa
6-20Starting/Stopping the ServiceThe task scheduler service can be started and stopped.To Make Settings...Choose “Start Service” or “Stop Service” fro
6-21Using the Picture Recording FunctionAutomatic Downloading by NotificationYou will not be able to record image and audio data if there is insuffici
6-22r “Apply” buttonSaves a change to the reception port number in the registry. If you make a change, a dialogbox is displayed. Click “Yes” and the t
6-23Using the Picture Recording Functionq “Search data” buttonSearches for data on the camera server according to the date/time, camera or trigger.w “
6-24Using VBCollectorr “Toggle folder tree” buttonSwitches between displaying and hiding the folder tree display area (!2).t “Toggle data list” button
6-25Using the Picture Recording FunctionUsing VBCollectorbeing recorded are indicated by yellow and white highlighting alternately.!2 Folder tree disp
iiIntroductionThank you for purchasing the Canon Network Camera VB-C50i/VB-C50iR (referred to hereafteras the VB-C50i/VB-C50iR).This User’s Manual des
1-4Viewer for Java Ver. 3.6Operating System/ Windows 2000 (SP4)/Microsoft Internet Explorer 6.0 (SP1), Netscape 7.1 or 7.2Web Browser Windows XP (SP1a
6-26Using VBCollector2. The detailed data information appears.q Image display areaShows the selected image. If the image is too large to fit in the di
6-27Using the Picture Recording Function● Zoom in/outImages can be zoomed in/out.[Magnification] Shows the current magnification (10~500%).[Zoom in] b
6-28● Change window sizeAs window size, large or normal size is available and is automatically selected depending onthe initial image size. However, y
6-29Using the Picture Recording Function3. A list of search results is displayed.A folder with the name you entered is created in the“Search Results”
6-30Extracting FilesDownloaded images and audio are collected and saved in the proprietary format used for filemanagement by the VBCollector Image Vie
6-31Using the Picture Recording FunctionNoteBecause downloaded images and audio are collected and saved in the proprietaryformat used for file managem
6-32Viewing LogsVBCollector outputs logs concerning the execution of tasks. To view a log, choose “Display Log”from the “Tools” menu bar.The following
6-33Using the Picture Recording FunctionDisplaying Logs According to Selection CriteriaLogs can be filtered according to error type, code, or date and
6-34Search LogsLogs can be searched using character strings. This function is convenient in case of searchingany target log from among numbers of logs
6-35Using the Picture Recording FunctionSelecting Log FilesThe initial log file of VBCollector is saved as “vbrpd.log” file in the “SYSTEM” folder wit
1-5Before Using the VB-C50i/VB-C50iRHardware and Software RequirementsVB Administration Tools Ver. 2.2 (→ P.4-2)This tool lets you create panorama pic
6-362. Enter information for each item in the Optiondialog box displayed and click the “OK”button.q Retention PeriodSpecify a max. retention period to
6-37Using the Picture Recording FunctionNote● When there is no more free space on the drive on which the files are saved, LogS023 “Execution failure:
6-38 006-VBC50i-E-US 06.7.6, 11:40 AM38
AppendixChapter 007-VBC50i-E-US 06.7.6, 11:38 AM1
7-2TroubleshootingBefore you contact your Canon dealer or service outlet, check the items listed below. If a logmessage is displayed, refer to the log
7-3AppendixTroubleshootingI forgot the password.● All factory defaults settings can be restored by using the Reset switch (→ P.7-22). Thedefault admi
7-4MessageExplanationResponse●A007 View restriction setting error (warning)inconsistent view restriction for camera[1]The view restriction settings ar
7-5AppendixLog MessagesMessageExplanationResponse●A008 Compatibility error in the view restrictions settings (warning)unacceptable view restriction fo
7-6MessageExplanation●A023 Detection in change of point of contact (err)a %1 detected at In%2%1point of contact device input change (front-edge | rear
7-7AppendixLog MessagesMessage●A050 Access permission when restricting user access (info)user %1 access grantedExplanationDuring user access restricti
1-6NoteUsing the VB-C50i/VB-C50iR with Windows XP SP2...If you use the VB Initial Setup Tool or VBCollector with Windows XP SP2, you will need tochang
7-8Message●B102 Client connection denied (notice)%1 request denied[%2]%1Client host IP address%2Denial type (41 | 42 | ...)ExplanationResponseClient c
7-9AppendixLog MessagesMessage●B103 Client access forced disconnection (notice)%1 access denied[%2]Explanation%1Client host IP address%2Denial type (4
7-10Log MessagesMessage●B401 Audio device initialization failed (crit)audio device initialization error[%1]%1Error numberResponseIf rebooting does not
7-11AppendixMessageExplanation●S005 System settings changed (info)System settings updatedThe VB software settings were modified without a reboot. Sy
7-12Log MessagesFault SeverityFault which affects task executionFault which does not affect task executionLevelErrorWarningInformation on correct oper
7-13AppendixLog Messages●S011 (err)Message Execution failure: Access to the data directory was denied.Explanation The drive for storing files does not
7-14Log Messages●D001 (info)Message Download has started.●D002 (info)Message Download is completed: image=%1audio=%2 [delete:image=%3audio=%4]%1 No. o
7-15AppendixLog Messages●D025 (err)Message Could not perform data deletion and audio file download because loginas Administrator failed.●D029 (err)Mes
7-16VB-C50i/VB-C50iRVideo signal Conforms to NTSC/PALImage Sensor 1/4-inch CCDNumber of pixels [NTSC] use: 340,000 (effective 630,000)[PAL] use: 400,0
7-17AppendixSpecifications+3.3V0.1µF10kΩ 10kΩ10kΩInternal controllerInput terminals IN+, IN–Output terminals OUT A, OUT B, OUT C+–External Device I/O
1-7Before Using the VB-C50i/VB-C50iRNoteUsing the VB-C50i/VB-C50iR with Windows Server 2003...With Windows Server 2003 Standard Edition running Micros
7-18Note● Install the Viewer for PC from the “VBToolsInstall.exe” file on the supplied CD-ROM (→ P.2-11).● The User’s Manual for the viewer software i
7-19AppendixSample Network ConfigurationsThis section describes some typical installation modes for the VB-C50i/VB-C50iR.Be sure to assign an IP addre
7-20Upgrading the Firmware RemotelyNote● Do not turn the power off until you have confirmed that the VB-C50i/VB-C50iR hasrestarted. Turning the power
7-21AppendixRestoring the Factory Default SettingsSince the VB-C50i/VB-C50iR supports a wide variety of functions, we recommend that you makea note of
7-22Restoring the Factory Default SettingsNote● Do not turn the VB-C50i/VB-C50iR power off while the Restoring operation. Turningthe power off before
7-23AppendixInitializing the Camera Head PositionTo Make Settings...1. Launch the Web browser and enter the following URL:http://192.168.100.1/support
7-24NoteDuring initializing,● The camera head moves to face front, and then moves back to the current position.Please note that video will be recorded
7-25AppendixFactory Default SettingsItem Setting Item Setting 1 Item setting 2 (m) (d) (y) (m) (d) (y)● Administrator ID root● Adm
7-26Factory Default SettingsItem Setting Item Setting 1 Item setting 2 (m) (d) (y) (m) (d) (y)● Server(Common Settings)Maximum Num
7-27AppendixData Capacity of Recorded Pictures and Audio*NoteThe information provided in this section is an indication only.Please be sure to confirm
1-8Hardware and Software RequirementsNetwork Video Recorder VK-64/VK-16 v1.2 (Storage Server System Requirements)MinimumCPU Pentium 4 2.2GHz or great
7-28NoteThe actual amount of audio data will vary according to the timing of recording.Amount of Audio Data*Regardless of the volume, and even if ther
7-29AppendixIndexAAC adapter ... iv, 2-6AC cable ...
7-30IndexHHome Position ... 3-10Host List ...
7-31AppendixIndexRecording between ON event and OFF event ... 4-47Recording interval between events ... 4-47Recording tab .
CANON INC. 30-2, Shimomaruko 3-chome, Ohta-ku, Tokyo 146-8501, JapanU.S.A. CANON U.S.A.,INC. NEW JERSEY OFFICE100 Jamesburg Road, Jamesburg, NJ 08831
1-9Before Using the VB-C50i/VB-C50iRSystem Components and Their OperationVB-C50iCamera headBasePower connection socketMulti-connectorYou can connect t
1-10System Components and Their OperationVB-C50iRMounting plateBaseLAN status LEDThe LED blinks during communication.100Base-TX ...
1-11Before Using the VB-C50i/VB-C50iRVB-C50iVB-C50iRSystem Components and Their OperationBottomOn the bottom of the VB-C50i/VB-C50iR there are the MAC
1-12Using the Multi-Terminal Module VB-EX50, you can connect external devices such as differentkinds of sensors, a microphone* and speaker to the unit
Setting UpThis chapter explains how to set up the VB-C50i/VB-C50iR,run initial checks, and confirm that the camera’s images aredisplayed correctly.Cha
iiiIntroductionRequest concerning disclosure of live videos and audioWith respect to the disclosure of live videos and audio, we request that sufficie
2-2Set up the camera1Perform initial settings for the camera3Connect the camera to the network2Chec4LAN cableVB-C50iHubSet up the device.Make sure the
2-3Setting UpSetup WorkflowetworkInstall the software5Check operation of the camera4Access the device with your PC, then display to check the image fr
2-41. Set Up the Cameraa WARNING:Install the camera securely.● When installing the VB-C50iR on the ceiling, contact your Canon dealer.● When installin
2-5Setting Up1. Set Up the Cameraa WARNING:The Wide Converter WL-37 is designed specifically for the VB-C50i and cannot beused on the VB-C50iR.Note● T
2-6Turning the Power ON and OFFThe VB-C50i/VB-C50iR itself does not have a power switch. You can switch the VB-C50i/VB-C50iR on by plugging the AC ada
2-7Setting UpOnce your PC and the camera are connected, perform the initial settings next. The instructionshere follow on from “2. Connect the Camera
2-83. The camera connected to the networkis automatically detected and its MACaddress, IP address and model nameare displayed.The factory default sett
2-9Setting Up5. A setup progress window appears andyour settings will be saved.Note● Set the IP address to a value that suits your environment.● Where
2-102. Your Web browser starts up and thetop page of the camera server appears.Click the “Using Viewer for Java” or the“Using Viewer for PC” and check
2-11Setting UpYou must install software to display images from the camera and to manage the camera. Thereare 3 types of software you can install.• VB
ivPackage ContentsThe VB-C50i/VB-C50iR package contains the following items. If any of these items is missing,please contact the retailer from which y
2-12Viewer Software OverviewBy using the Viewer software, you can view images sent from the VB-C50i/VB-C50iR on a PC, aswell as control the camera. Be
Basic SettingsThis chapter describes the basic settings for the VB-C50i/VB-C50iR such as network connection, camera control, dateand time setting and
3-2What Can I Do on Each of the Settings Pages?Proceed to each of the settings pages from the Settings Title Page where you can perform varioussetting
3-3Basic SettingsAccessing the Settings Title PageNoteThis manual uses the IP address 192.168.100.1 (the factory default setting) below asan example t
3-4Settings Title PageFrom the Settings Title Page, you can move to each settings page, confirm the settings afterchanging, and save the changes to th
3-5Basic SettingsYou can perform the following settings with System and Network.● Root Account: For setting up passwords.● Ethernet: For setting up IP
3-6Ethernet 1 “Address Setting Method”Select an address setting method from “Auto Setting (DHCP)” or “Manual Setting”. If you select“Auto Setting (D
3-7Basic SettingsYou can perform the following settings with Camera and Video.● Video Capture: For setting image size and quality.● Camera Control: Fo
3-8Camera Control1 “Shutter Speed”Set the camera shutter speed. Select the shutter speed for the camera from “Auto”, “1/60” or“1/100” for NTSC, or “Au
3-9Basic SettingsSetting Camera Control, Image Size and Quality (Camera and Video)Note● The camera may have difficulty focusing automatically on subje
vContentsIntroduction ... iiPackage Contents ...
3-10Setting Camera Control, Image Size and Quality (Camera and Video)TipThe operating range of the camera heads on the VB-C50i/VB-C50iR is shown below
3-11Basic SettingsSetting Camera Control, Image Size and Quality (Camera and Video)Tip● Controllable range and shootable range are shown below.0°+-+-E
3-12Camera Names1 “Camera Name”Used in the camera selection box on the viewers. This setting is required.1Setting Camera Control, Image Size and Quali
3-13Basic SettingsPresetting Best Shot (Preset)You can perform the following settings with Preset.● Common Settings: For setting the tour schedule of
3-14Presetting Best Shot (Preset)1 “Restrict Camera Control to Presets”Camera control by using the Viewer for PC and the Viewer for Java can be restri
3-15Basic SettingsPreset 1-20NoteChanges in the preset settings are not applied to the viewer while it is connected.TipYou can make preset settings mo
3-16You can perform the following Settings with Server.● Common Settings: For setting up the environment where users can connect to theVB-C50i/VB-C50i
3-17Basic SettingsHTTP Server1 “HTTP Port”Set the TCP port number for the HTTP. Enter a value between 1 and 65535. The defaultsetting is 80.2 “Global
3-18Camera Server1 “Video Transmission Port”Set the TCP port number for the video transmission protocol. Enter a value between 1 and65535. The default
3-19Basic SettingsAudio Server 1-5, 8 are only displayed with two particular models (→ P.iii).1 “Audio Transmission”Set “Audio Transmission” to “Used
viContentsSetting Up the HTTP, Camera and Audio Servers (Server) ... 3-16Setting User Access Privileges (Access Control) ...
3-20Audio Reception• Output Volume• Echo CancellerSetting Up the HTTP, Camera and Audio Servers (Server)Note● Use the Multi-Terminal Module (→ P.1-12
3-21Basic SettingsSetting User Access Privileges (Access Control)You can perform the following settings with Access Control.●Authorized User Account:
3-22Authorized/Restricted Host SpecificationNote● If you do not make a Host List, access is permitted to any hosts.● If the Host List provided prohibi
3-23Basic SettingsTipThe Host Restriction function applies to hosts running client applications such asviewer. Access restrictions are imposed using a
3-24Setting the Date and Time (Date and Time)You can perform the following settings with Date and Time.● Current Camera Time: Displays the time set up
3-25Basic SettingsNew Camera Time1 “Synchronize with computer time”Set to the date and time of the PC currently accessing the VB-C50i/VB-C50iR via a W
3-26You can perform the following settings with Miscellaneous.● DNS: Register the Name Server Address and Host Name for registering host namessuch as
3-27Basic SettingsMail1 “Mail Server Host”Specify the SMTP server.2 “Sender’s (From) Mail Address”Specify the mail sender.3 “Recipient (To) Mail Addre
3-28External Device Names1 “External Input Device 1-2”“Device Name”To distinguish between the different external devices connected to the Multi-Termin
3-29Basic SettingsYou can use the following items with the Administration Tools.●On-board File System Information: Displays the status of VB-C50i/VB-C
viiContentsLog Viewer ... 4-62Viewing the Log ...
3-30Miscellaneous1 “View Log Events”Click the “View” button to see the historical log files of the VB-C50i/VB-C50iR’s operation,such as connection wit
VB Administration ToolsChapter 4 describes practical ways of operating the VB-C50i/VB-C50iR using the VB Administration Tools to createpanoramas, set
4-2Overview of VB Administration ToolsVB Administration Tools comprises “VBAdmin Startup Panel”, “Panorama Creation Tool”, “ViewRestriction Tool”, “Pr
4-3VB Administration ToolsVBAdmin Startup Panel (→ P.4-5)This is the main panel of VB Administration Tools. The tools arestarted up from this panel.In
4-4Overview of VB Administration ToolsLog Viewer (→ P.4-62)This tool enables viewing of operation status logs that are outputto the VB-C50i/VB-C50iR.A
4-5VB Administration ToolsStarting Up VB Administration ToolsTo Start Up...1. Double-click the “VB Admin Tools” desktopicon or select “VB Admin Tools”
4-63. The VBAdmin Startup Panel starts up.The six tools---“Panorama Creation Tool”, “ViewRestriction Tool”, “Preset Setting Tool”, “ScheduleSetting To
4-7VB Administration ToolsPanorama Creation ToolThe Panorama Creation Tool is used to take and create panorama pictures from the VB-C50i/VB-C50iR. Onc
4-8Panorama Creation Tool Display ScreenAn overview of the functions of the GUI displayed when the Panorama Creation Tool starts up isshown below.q “D
4-9VB Administration ToolsTipSince the range that can be captured varies with the type of camera, the displayranges of the panorama pictures are diffe
viiiContentsUsing the Still Picture Recording Functionwith a Predetermined Schedule ... 6-6Sample
4-103. When capturing ends and the picture issatisfactory, click the “OK” button.Panorama creation can be discarded, or the AE lockposition or backlig
4-11VB Administration ToolsReconnectingReconnections are made when a connection with the VB-C50i/VB-C50iR has been cut.To Reconnect...1. Choose “Recon
4-12The View Restriction Setting Tool enables you more visually and easily to set limits on the videowhich can be seen by users. A View Restriction is
4-13VB Administration ToolsView Restriction Tool Display ScreenAn overview of the functions of the GUI displayed when the View Restriction Tool starts
4-14View Restriction Toolt Camera Selection boxAnother camera cannot be selected with the VB-C50i/VB-C50iR.y “Apply the view restriction”View restrict
4-15VB Administration ToolsSetting View RestrictionsYou can set up a view restriction by either entering a value in the view restriction setting input
4-16View Restriction ToolRetrieving Values from the Camera Angle of the Admin Viewer andChanging SettingsAdmin Viewer can be used to set the view rest
4-17VB Administration ToolsNoteThe Panorama Preview may be slightly different from the actual picture. After theview restrictions have been set, pleas
4-18Preset Setting ToolThe Preset Setting Tool enables you more visually and easily to set Presets and home position.Presets are set by operating the
4-19VB Administration ToolsPreset Setting ToolPreset Setting Tool Display ScreenThe display screen for the Preset Setting Tool is divided into the “Pr
ixHow to Read This ManualNETWORK CAMERAUser’s ManualVB-C50iPlease read this instruction manual carefully before operation.Be sure to read the “a Safe
4-20Preset Setting Toolt Preset Selection boxSelect the preset to set or “Home”. “Home” is the setting for home position.y “For picture recording only
4-21VB Administration ToolsPreset Setting ToolSetting PresetsYou can set up Presets by either entering a value in the camera parameters or by using th
4-22Retrieving Values from the Camera Angle of the Admin Viewer andChanging SettingsStart up Admin Viewer and set the camera angle as a preset.To Make
4-23VB Administration ToolsTip● You can set a maximum of 20 presets.● Changes in the preset settings are not reflected to the viewer while it is conne
4-24Preset TourA Preset Tour can tour and monitor two or more specified Presets.You can also set Preset Tour with “Presetting Best Shot” in Chapter 3,
4-25VB Administration Toolso Speed (Z)Sets the speed at which the camera moves when zooming, within a range of 1-8. By movingthe slide bar from left t
4-262. Select the preset number you want to add tothe Tour Schedule from the Preset settingarea and click the “Add” button.The preset is registered in
4-27VB Administration ToolsSchedule Setting ToolWith the Schedule Setting Tool, you can set up Timer, Motion Detection, Night Mode, ExternalDevice Inp
4-28Schedule Setting Tool Display Screen (Toolbar)There are two kinds of Schedule settings, Normal Schedule and Special Schedule. The buttons inthe to
4-29VB Administration ToolsNormal ScheduleWith Normal Schedule, you can set up a schedule of one week from Sunday to Saturday. Forexample, during the
Related products and manuals for Security cameras Canon VB-C50i/VB-C50iR
 (167 pages)
(2 pages)
(176 pages)
(172 pages)
(167 pages)
(2 pages)
(176 pages)
(172 pages)
© 2020, manymanuals.com. All rights reserved. | 0.843 s |
 Manymanuals.com
 Manymanuals.de
 Manymanuals.fr
 Manymanuals.it
 Manymanuals.pl
 Manymanuals.cz
 Manymanuals.es
 Manymanuals-pt.com
Comments to this Manuals