Canon MV 6 I MC Instruction Manual
Browse online or download Instruction Manual for Camcorders Canon MV 6 I MC. Canon MV 6 I MC Instruction manual User Manual
- Page / 86
- Table of contents
- TROUBLESHOOTING
- BOOKMARKS
- Instruction Manual 1
- Important Usage Instructions 2
- Using this Manual 3
- About the Operating Modes 4
- Table of contents 5
- Introduction 7
- * Europe only 7
- ** Not included with the 7
- Components Guide 8
- Front view 9
- Rear view 9
- Bottom view 9
- Preparing the Power Supply 10
- Installing the Backup Battery 12
- Loading/Unloading a Cassette 13
- Preparing the Camcorder 14
- Adjusting the LCD Screen 15
- Setting the Date and Time 16
- Basic Functions 17
- Preparations 17
- Recording Movies on a Tape 18
- Displaying the Level Marker 19
- Joystick 20
- Program selector 20
- Recording 21
- Optical Zoom 22
- Digital Zoom 23
- Selecting the Zoom Speed 24
- Tips for Making Better Videos 25
- Playing Back a Tape 26
- Special Playback Modes 27
- Adjusting the Volume 28
- Playing Back on a TV Screen 29
- Signal flow 30
- STV-250N Stereo Video Cable 30
- (supplied) 30
- Open the terminal cover 30
- Selecting the Type of TV 31
- AUDIO SETUP OUTPUT CH L/R 32
- Menus and Settings 33
- Menu and Default Settings 34
- ST-1 ST-2 35
- Using the Recording Programs 36
- Spotlight 37
- Fireworks 37
- Selecting a Recording Program 39
- Adjusting the Focus Manually 41
- Infinity Focus 42
- Setting the White Balance 43
- Selecting an Image Effect 44
- Setting the Shutter Speed 45
- Auto Slow Shutter 46
- Using the Self-Timer 47
- VCR SETUP REC MODE STD PLAY 48
- Audio Recording 49
- Using an External Microphone 50
- Using Digital Effects 51
- Selecting a Fader 52
- Selecting an Effect 53
- Press the WIDE SCR button 54
- Magnifying the Image 55
- Displaying the Data Code 56
- End Search 57
- Changing the Display Language 59
- Other Camcorder Settings 60
- CAMERA SETUP IMG STAB ON 61
- SYSTEM SETUP START-UP IMG ON 61
- Demonstration Mode 62
- Connecting the Devices 63
- Devices (DV Dubbing) 65
- Concerning Copyright 66
- Computer 67
- Screen Displays 68
- (see also 21) 69
- List of Messages 70
- Maintenance/Others 71
- Viewfinder 72
- Video Heads 72
- Condensation 72
- How to avoid condensation: 72
- Resuming use: 73
- Cassette Handling Precautions 74
- Using the Camcorder Abroad 75
- Troubleshooting 76
- Playback 78
- Additional 79
- Information 79
- Optional Accessories 80
- SC-2000 Soft Carrying Case 81
- Specifications 82
- CA-570 Compact Power Adapter 83
- BP-2L5 Battery Pack 83
- 0056W487 86
- PUB.DIE-253 86
- 00000/Ni0.0 86
- © CANON INC. 2006 86
- PRINTED IN JAPAN 86
Summary of Contents
EnglishPUB.DIE-253PALEnglishIntroductionBasicFunctionsAdvancedFunctionsEditingAdditionalInformationDigital Video CamcorderInstruction ManualMiniDigita
10Basic Functions Preparatio nsPreparing the Power SupplyAttaching the Battery Pack1. Turn the switch to .2. Attach the battery pack to the camcord
11Basic FunctionsPreparationsEUsing a Household Power SourceConnect to a household power source to use the camcorder without worrying about the batter
12 Charging, Recording and Playback TimesThe following times are approximate and vary according to the charging, recording or playback conditions.\*
13Basic FunctionsPreparationsELoading/Unloading a CassetteUse only videocassettes marked with the logo.1. Slide the OPEN/EJECT switch and open the
14Preparing the CamcorderAdjusting the Viewfinder (Dioptric Adjustment)1. Turn on the camcorder and keep the LCD panel closed.2. Adjust the dioptric a
15Basic FunctionsPreparationsEAdjusting the LCD ScreenRotating the LCD ScreenOpen the LCD panel 90 degrees.• You can rotate the panel by 90 degrees ou
16Setting the Time Zone, Date and TimeSet the time zone, date and time when you first start using your camcorder, or when you have replaced the backup
17Basic FunctionsPreparationsE8. Press the FUNC. button to close the menu.Time Zones and Difference from GMT/UTC.Once you have set time zone, date and
18RecordingRecording Movies on a TapeRecording1. Open the lens cover (move the lens cover switch down to ).2. Set the camcorder to mode.Set the s
19Basic FunctionsRecordingE About the LCD and viewfinder screen: The screens are produced with extremely high-precision manufacturing techniques, wit
2Introducti onImportant Usage InstructionsWARNING!TO REDUCE THE RISK OF FIRE OR ELECTRIC SHOCK, DO NOT REMOVE COVER (OR BACK) NO USER SERVICEABLE PART
20Reviewing and Searching when RecordingRecord ReviewIn record pause mode, this function allows you to review the last few seconds of your recording t
21Basic FunctionsRecordingEWhen the camcorder shuts off automatically, the record review and record search functions will not work. To resume normal o
22ZoomingThe camcorder is equipped with optical zoom and digital zoom.Optical ZoomMove the zoom lever toward W to zoom out (wide-angle). Move it towar
23Basic FunctionsRecordingEDigital ZoomWhen the digital zoom is activated, the camcorder automatically switches between optical and digital zoom. With
24Selecting the Zoom Speed You can set the zoom speed to variable or to one of 3 levels of fixed zoom speeds. When set to [VARIABLE], the zoom speed d
25Basic FunctionsRecordingETips for Making Better VideosHolding the CamcorderFor maximum stability, grip the camcorder in your right hand and keep you
26PlaybackPlaying Back a Tape1. Set the camcorder to mode.Set the switch to PLAY.2. Open the LCD panel.You can also close the LCD panel with the s
27Basic FunctionsPlaybackESpecial Playback Modes/ (Playback Pause)During normal playback, push the joystick ( ) towards / . (Fast Forward Playback)
28Adjusting the VolumeWhen you use the LCD screen for playback, the camcorder plays back the sound using the built-in speaker. The sound will be muted
29Basic FunctionsPlaybackEPlaying Back on a TV ScreenTVs with SCART TerminalRefer also to the TV or VCR instruction manual.1. Turn off all the devices
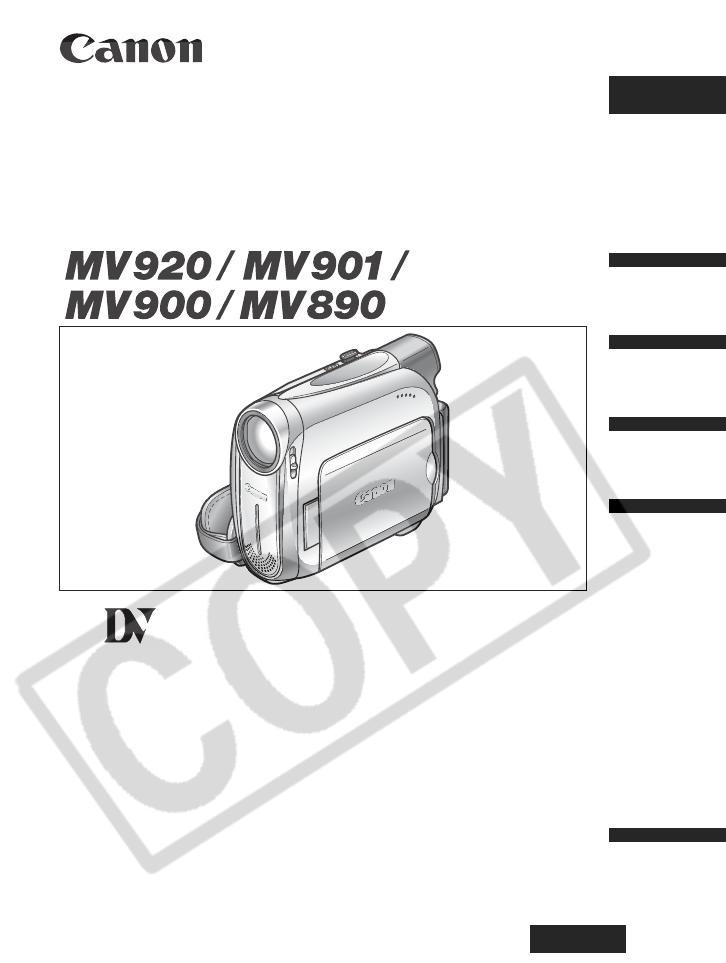
3IntroductionEUsing this ManualThank you for purchasing the Canon MV920/MV901/MV900/MV890. Please read this manual carefully before you use the camcor
30TVs with Audio/Video TerminalsRefer also to the TV or VCR instruction manual.1. Turn off all the devices before starting the connections.2. Connect
31Basic FunctionsPlaybackESelecting the Type of TV During playback set the [TV TYPE] option according to the TV set to which you connect the camcorder
32Selecting the Audio Output ChannelYou can select the output channels when playing back a tape with audio recorded on two channels.1. Press the FUNC.
33Advanced FunctionsEAdvanced F unctionsMenus and SettingsThe camcorder’s functions and settings are controlled from a series of menus that appear whe
34Menu and Default SettingsDefault settings are shown in boldface.* The item will not appear in mode.Submenu Menu Item Setting OptionsFUNC. menu Rec
35Advanced FunctionsE1 only.Submenu Menu Item Setting OptionsFUNC. menu Speaker Volume 28Recording Pause1-65End Search - 57Digital Effects D.EFFECT OF
36RecordingUsing the Recording ProgramsEasy Recording ProgramThe camcorder adjusts focus, exposure and other settings automatically, allowing you to j
37Advanced FunctionsRecordingEBeachUse this mode to record on a sunny beach. It prevents the subject from being underexposed.SunsetUse this mode to re
38Availability of Functions in Each Mode:: Available : Not available A: Auto settingSelecting the Easy Recording ProgramSet the program selecto
39Advanced FunctionsRecordingESelecting a Recording Program1. Set the program selector to .2. Press the FUNC. button to open the FUNC. menu.3. With t
4About the Operating ModesThe operating modes are determined by the position of the switch. : Function can be used in this mode. : Function cannot b
40Adjusting the Exposure ManuallyAdjust the exposure when a backlit subject becomes underexposed, or overexposed due to bright light.1. Set the progra
41Advanced FunctionsRecordingEAdjusting the Focus ManuallyAutofocus may not work well on the following subjects. In such case, focus manually.1. Set t
42• To return to autofocus, push the joystick ( ) towards [FOCUS] once more. “MF” will disappear and [FOCUS] will turn white again.6. Push the joystic
43Advanced FunctionsRecordingESetting the White BalanceYou can use the preset modes to reproduce colors more accurately, or set a custom white balance
44 Use the auto setting for normal outdoor scenes. When the program selector is set to , the white balance is preset to [AUTO]. The camcorder reta
45Advanced FunctionsRecordingESetting the Shutter SpeedYou can adjust the shutter speed manually to make stable shots of fast moving subjects. Availab
46Auto Slow ShutterIn the Easy Recording mode or when the shutter speed is set to [AUTO] in the Program AE recording program, the camcorder uses s
47Advanced FunctionsRecordingEUsing the Self-Timer1. Open the FUNC. menu and select ( ) the self timer icon. 2. Set ( ) it to [SELF TIMER ON] and clos
48Changing the Recording Mode (SP/LP)You can choose between SP (standard play) and LP (long play). LP extends the tape usage by 1.5 times.1. Open the
49Advanced FunctionsRecordingEAudio RecordingChanging the Audio ModeYou can record sound in two audio modes—16-bit and 12-bit. The 12-bit mode records
5EIntroductionTable of contentsIntroductionUsing this Manual ...
50Using an External MicrophoneYou can connect an external microphone to the MIC terminal. Use commercially available condenser microphones with their
51Advanced FunctionsRecordingEUsing Digital EffectsFaders ( 52)Begin or end scenes with a fade to or from black.Fade Trigger (FADE-T) Wipe (WIPE)Corn
52Effects ( 53)Add flavor to your recordings.Selecting a FaderIn mode, set the program selector to .* Not available if the TV type is set to [NORM
53Advanced FunctionsRecordingEFade out: During recording, press the D.EFFECTS button and pause recording by pressing the start/stop button.The fader c
54Widescreen TV Recording (16:9)The camcorder uses the full width of the CCD providing high-resolution 16:9 recording.Press the WIDE SCR button.• “ ”
55Advanced FunctionsPlaybackEPlaybackMagnifying the ImageThe playback image can be magnified up to 5 times.1. Move the zoom lever toward T.• The image
56Displaying the Data CodeThe camcorder maintains a data code containing the recording date and time. You can select the data code combination and dis
57Advanced FunctionsPlaybackEEnd SearchWhen you have played back a tape, you can use this function to locate the end of the last recorded scene.In sto
58Playing Back a Tape with Added SoundYou can select to play back Stereo 1 (original sound), Stereo 2 (added sound), or adjust the balance of both sou
59Advanced FunctionsOther FunctionsEOther FunctionsChanging the Display LanguageThe language used for screen display and menu items can be changed. Th
6List of Messages...70Maintenance/Others ...
60Other Camcorder SettingsBeepYou will hear a beep upon camcorder operations such as power on/off, start/stop, self-timer countdown, and unusual condi
61Advanced FunctionsOther FunctionsETurning Off the Image StabilizerThe image stabilizer compensates for camcorder shake even at full telephoto. It tr
62Demonstration ModeThe demonstration mode displays the camcorder’s main features. It starts automatically when you leave the camcorder turned on (usi
63EEditingEditingRecording to a VCR or Digital Video DeviceYou can copy your recordings by connecting the camcorder to a VCR or a digital video device
64 We recommend powering the camcorder from a household power source. When connecting a VCR, the quality of the edited tape will be slightly lower t
65EEditing Recording from Digital Video Devices (DV Dubbing)You can record from other digital video devices equipped with a DV terminal with virtually
66Concerning CopyrightCopyright PrecautionCertain pre-recorded video tapes, films and other materials, as well as some television programmes are copyr
67EEditingTransferring Video Recordings to a ComputerTransferring Using a DV CableYou can transfer recordings to a computer equipped with a IEEE1394 (
68Additional InformationScreen DisplaysHiding the Displays on the LCD ScreenYou can hide the displays on the LCD screen to have a clear screen for pla
69EAdditional InformationScreen Displays during Recording/Playback (see also 21)Self-timer ( 47)Digital effects ( 51)Shutter speed ( 45)Exposure lo
7EIntroductionChecking the Supplied Accessories* Europe only.** Not included with the .CA-570 Compact Power Adapter(incl. power cord)BP-2L5 Battery P
70List of MessagesMessage ExplanationSET THE TIME ZONE, DATE AND TIMEYou have not set the time zone, date and time. This message appears each time you
71EAdditional InformationMaintenance/OthersCamcorder Handling Precautions Do not carry the camcorder by the LCD panel. Do not leave the camcorder in
72Viewfinder Clean the viewfinder screen using a blower brush or a commercially available cleaning cloth for glasses.Video Heads When the playback p
73EAdditional InformationWhen condensation is detected: The camcorder stops operating and the warning message “CONDENSATION HAS BEEN DETECTED” appear
74About the battery terminal coverThe battery terminal cover has a [ ]-shaped hole. This is useful when you wish to differentiate between charged and
75EAdditional InformationProtecting Tapes from Accidental ErasureTo protect your recordings from accidental erasure, slide the tab on the cassette to
76TroubleshootingIf you have a problem with your camcorder, refer to this checklist. Consult your dealer or a Canon Service Center if the problem pers
77EAdditional InformationRecordingProblem Cause SolutionImage will not appear on the screen.Camcorder is not set to mode.Set the camcorder to mode.1
78PlaybackProblem Cause SolutionPressing the playback button does not start playback.Camcorder is turned off, or is not set to mode.Set the camcorde
79EAdditional InformationSystem Diagram (Availability differs from area to area)* The BP-2L5 is not available as a separate optional accessory.CB-2LTE
8Components GuideMV920/MV901/MV900/MV8900Left side viewRight side viewLens cover switch ( 18)( open, closed)LCD BACKLIGHT button ( 15)Speaker (
80Optional AccessoriesBattery PacksWhen you need extra battery packs, select from the following: NB-2L, NB-2LH, BP-2L12, BP-2L14.CB-2LTE/CB-2LWE Batte
81EAdditional InformationSC-2000 Soft Carrying CaseA handy camcorder bag with padded compartments and plenty of space for accessories.This mark identi
82SpecificationsMV920/MV901/MV900/MV890SystemVideo Recording System 2 rotary heads, helical scanning DV system (consumer digital VCR SD system), digit
83EAdditional InformationCA-570 Compact Power AdapterBP-2L5 Battery PackWeight and dimensions are approximate. Errors and omissions excepted. Subject
84Index16:9 (Widescreen) . . . . . . . . . . . . . . . . 546-second auto date . . . . . . . . . . . . . . . 56AAbroad, using the camcorder . . . .
85Additional InformationERecording programs . . . . . . . . . . . . . . . 36SSelf timer . . . . . . . . . . . . . . . . . . . . . . . 47Shutter speed
CANON INC.Canon Europa N.V.P.O. Box 2262, 1180 EG Amstelveen, The NetherlandsCanon UK Ltd.CCI Service Centre, Unit 130Centennial Park, Borehamwood, He
9EIntroductionFront viewRear viewBottom viewStereo microphoneViewfinder ( 14)Dioptric adjustment lever ( 14)BATT. (battery release) button ( 10)LCD
Related products and manuals for Camcorders Canon MV 6 I MC
 (40 pages)
(19 pages)
(3 pages)
(40 pages)
(19 pages)
(3 pages)
 (189 pages)
(138 pages)
(189 pages)
(138 pages)
 (145 pages)


 (3 pages)
(16 pages)
(219 pages)
(11 pages)
(126 pages)
(100 pages)
(3 pages)
(16 pages)
(219 pages)
(11 pages)
(126 pages)
(100 pages)
 (658 pages)
(130 pages)
(184 pages)
(658 pages)
(130 pages)
(184 pages)
© 2020, manymanuals.com. All rights reserved. | 1.432 s |
 Manymanuals.com
 Manymanuals.de
 Manymanuals.fr
 Manymanuals.it
 Manymanuals.pl
 Manymanuals.cz
 Manymanuals.es
 Manymanuals-pt.com
Comments to this Manuals